
 Pin
Pin
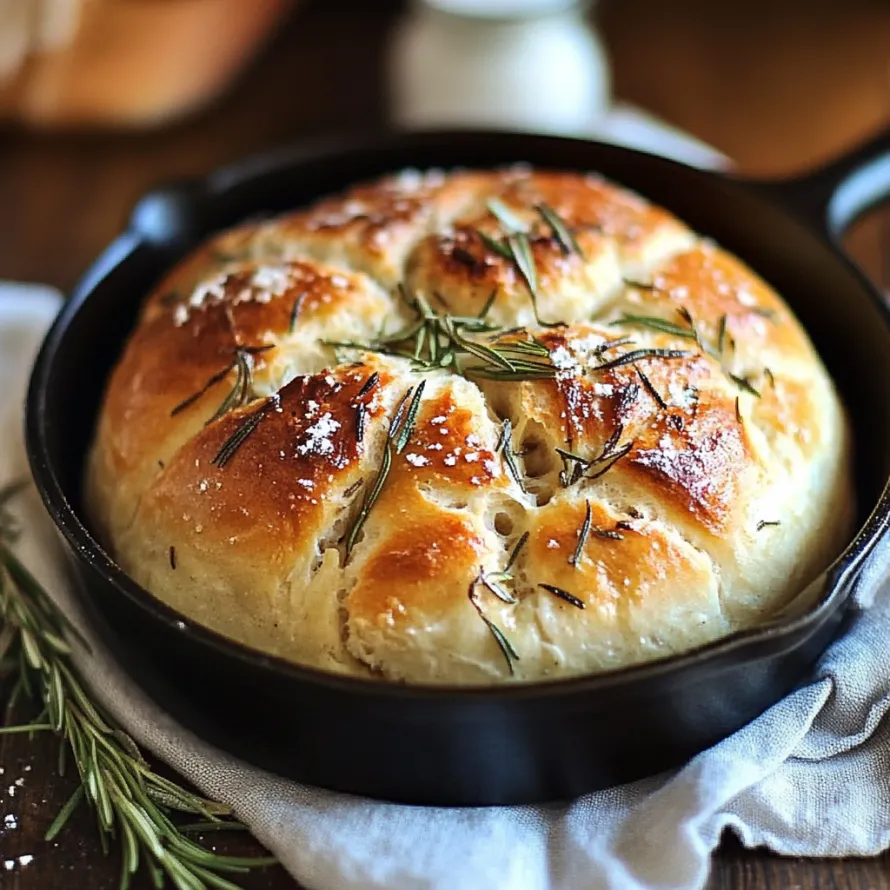
This homespun skillet bread combines earthy garlic and fragrant rosemary for a homemade loaf that rivals fancy bakeries. When these herbs mingle together, your kitchen fills with mouthwatering smells that'll draw everyone in before you've even pulled it from the oven.
I whipped up this bread when friends popped by with barely two hours' notice. Watching their faces light up after that first warm bite convinced me I needed to keep making this regularly.
Ingredients
- All purpose flour: Gives you that ideal middle-ground texture that's not too heavy or light
- Instant yeast: Makes everything quicker since you can skip separate proofing
- Salt: Boosts flavors while keeping yeast growth in check
- Sugar: Feeds your yeast to make sure your bread rises properly
- Olive oil: Brings a lovely richness and helps form that beautiful outer crust
- Warm water: Wakes up the yeast - should feel like comfortable bathwater
- Fresh garlic cloves: Taste way better than the jarred stuff or powder
- Fresh rosemary: Adds wonderful piney scent - if using dried, cut amount in half
- Coarse sea salt: Sprinkled on top for little bursts of crunchiness and flavor
Easy Preparation Steps
- Mix Dry Stuff Together:
- Dump flour, yeast, salt and sugar in a big bowl and stir them up well. This spreads everything evenly so the salt doesn't directly touch the yeast and slow it down.
- Form Your Dough:
- Add olive oil and warm water, then stir with a wooden spoon until it all comes together. Don't worry if it looks a bit rough at first - that's normal. Just keep mixing until all the flour gets worked in.
- Put In The Flavors:
- Mix in your chopped garlic and rosemary, working them through the dough by hand. This makes sure you'll taste those awesome flavors in every bite. Knead about 5 minutes until your dough feels smooth and bounces back when you poke it.
- Let It Grow:
- Cover your bowl with a kitchen towel or plastic and put it somewhere cozy without drafts. Give it an hour to puff up until it's twice as big. A sunny spot or near your stove works great when it's cold out.
- Get Things Hot:
- Put your cast iron pan in the oven and turn it up to 400°F. Warming the pan first helps make that amazing bakery-style crust. Give it at least 10 minutes to get properly hot.
- Make It Round:
- Gently push down on your puffy dough and shape it into a ball. No need to knead again - just use your hands to form a nice round loaf.
- Into The Hot Pan:
- Using thick oven mitts, pull out that hot skillet. Give it a quick coat of oil, then set your dough ball in the middle. Move fast but carefully so you don't burn yourself.
- Last Touches:
- Brush plenty of olive oil on top of your dough to help it turn golden and crispy. Scatter sea salt across the surface for extra taste and a pretty look.
There's something special about pulling this bread from the oven. In my house, someone always grabs the first slice while it's still too hot to handle properly. Somehow that makes it taste even better. I've noticed that spending a little extra on good olive oil really shows in both the taste and texture.
Prepare It Early
You can mix up this dough a full day ahead and store it in your fridge. The slow, cold rising actually makes it taste even better. Just take it out about half an hour before baking so it can warm up, then follow the same cooking steps.
Perfect Companions
This bread tastes amazing with chunky soups and rich stews, especially tomato-based ones where you can mop up all the tasty liquid. For a simple but impressive starter, serve warm chunks with good olive oil and balsamic for dipping. It also makes fantastic sandwich bread, particularly for grilled cheese or Italian-style layered sandwiches.
Change Up The Flavors
While garlic and rosemary work wonderfully together, you can easily switch things around. Try throwing in sundried tomatoes and basil for an Italian feel, or swap rosemary for thyme and add some grated parmesan for French flair. For something more substantial, mix in chopped olives and crumbled feta cheese.
Save a bit of extra olive oil and fresh herbs to drizzle on top when serving for an even tastier treat!
Recipe Q&A
- → Can I use dried rosemary instead of fresh?
Definitely! You can swap in dried rosemary, but only use about 2 teaspoons since dried herbs pack more punch than fresh ones. For better taste, rub the dried rosemary in your hands first to let more of its oils out.
- → What if I don't have a cast-iron skillet?
Any oven-safe container will do the trick. A normal baking tray works too, though your bread won't get quite the same crispy outside. With a baking tray, just shape your dough into a round on some baking paper and move it onto the hot tray.
- → How do I know when the bread is fully baked?
Your bread should look golden brown on top and make a hollow sound when you tap the bottom. If you've got a food thermometer, the middle should reach about 190-200°F (88-93°C).
- → Can I add other herbs or ingredients to this bread?
You bet! This bread goes well with lots of add-ins like shredded parmesan, dried tomatoes, olives, or other herbs such as thyme or sage. Just don't add too many wet things as they'll change how your dough turns out.
- → How should I store this bread?
After it's totally cool, keep it in a paper sack or bread box at room temp for up to 3 days. To keep it longer, cut it up and freeze it in a sealed container for up to 3 months. You can bring frozen slices back to life with a quick toast.
- → Can I make the dough ahead of time?
Sure thing, you can stick the dough in the fridge after kneading for up to a day. This actually makes it taste even better. Just let the cold dough sit out for about 30 minutes before you shape and bake it.