
 Pin
Pin
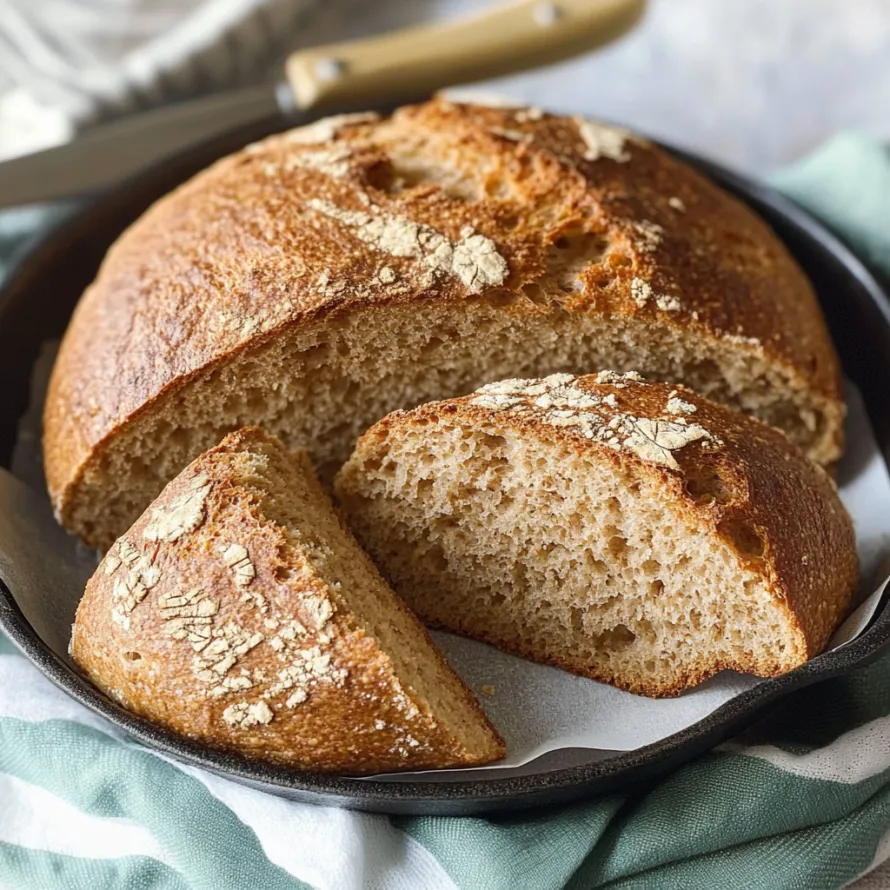
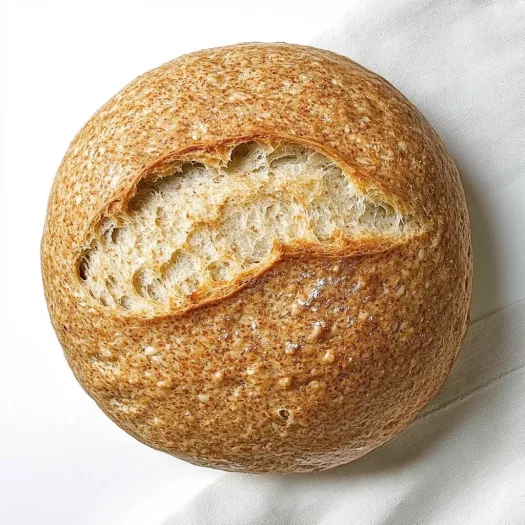
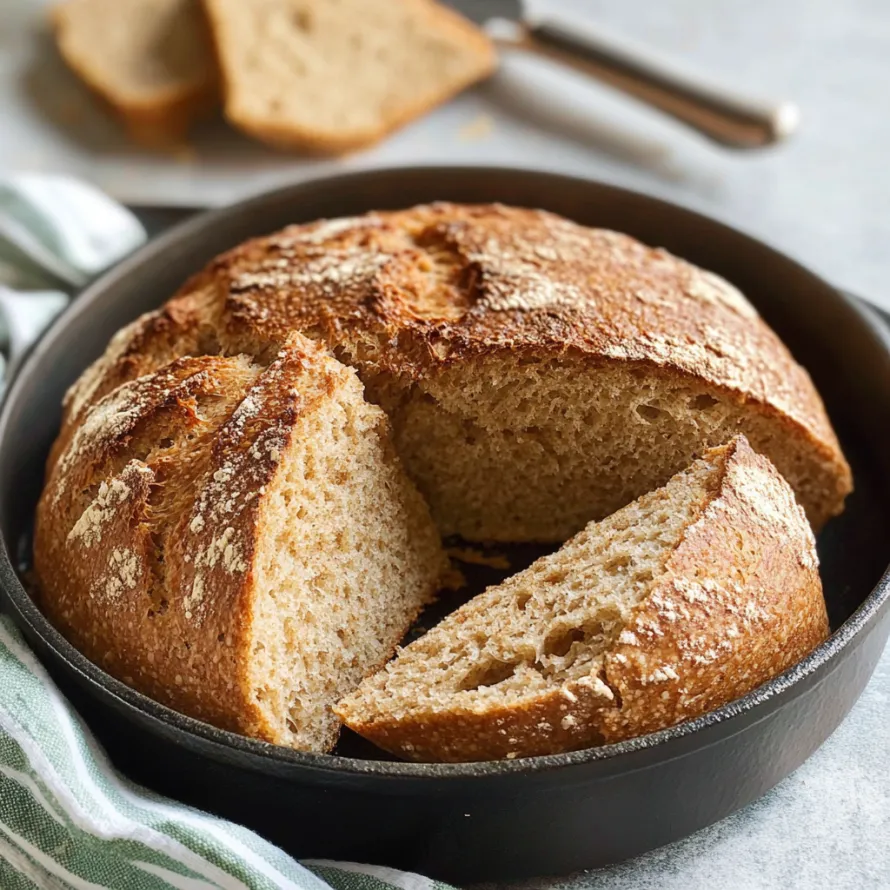
This easy whole wheat bread turns just four basic ingredients into an amazing homemade loaf with barely any work. Let it sit overnight and the flavors deepen while you sleep, and the Dutch oven trick gives you that crackly crust you'd normally only get from a fancy bakery.
I stumbled onto this bread method when grocery stores ran out of everything during lockdown. These days it's our weekly Sunday thing—my kids get excited watching the dough grow overnight, and that fresh-baked smell has become the official start of our weekends.
What You'll Need
- Warm water: Around 100-115°F creates the right environment for your yeast to wake up without killing it
- Kosher salt: Boosts taste and regulates the fermentation process - try to get the flaky kind for best results
- Dry active yeast: Makes everything rise - double-check it hasn't expired or your bread won't puff up
- Whole wheat flour: Gives that hearty flavor and extra nutrients - spend a bit more on good quality for better bread
Simple Baking Steps
- Throw Everything Together:
- Put your flour, yeast, and salt in a big bowl. Grab a wooden spoon and slowly add the warm water while stirring until everything's wet. Don't worry if it looks rough and sticky. This takes maybe 2 minutes - just make sure there's no dry flour hiding at the bottom.
- Let It Do Its Thing:
- Cover your bowl with plastic wrap or a kitchen towel and put it somewhere without drafts at room temp. Let it sit for at least 8 hours or just leave it overnight. During this time, the flavors get deeper and the dough builds structure naturally. You'll see it double up with bubbles all over the top.
- Form Your Loaf:
- Dump the bubbly dough onto a floured counter. With floured hands, carefully fold the edges toward the middle to make a round shape. Try not to pop all those nice air bubbles. The dough will feel bouncy and alive. Let it rest while you get the oven ready.
- Heat Your Pot:
- Put your Dutch oven with the lid on into your cold oven. Crank it up to 450°F and let them heat up together for about 30 minutes. This creates the steam pocket that makes your crust amazing.
- First Bake With Lid:
- Using serious oven mitts, take out that super-hot Dutch oven. Carefully drop your shaped dough into the hot pot. Put the lid back on and get it back in the oven right away. Bake it for 30 minutes. During this part, the bread steams inside the closed pot, helping it rise fully.
- Second Bake Without Lid:
- Take the lid off to let the steam escape. Keep baking another 20 minutes until the outside turns a rich golden brown. If you tap the bottom, it should sound hollow. This final open-air bake creates that crunchy outside everyone loves.
- Wait Before Cutting:
- Take your bread out of the pot and set it on a cooling rack. Let it cool down for at least 30-45 minutes before slicing. The bread keeps cooking inside during this time and sets up properly. Cut too early and you'll end up with gummy bread.
The Dutch oven really is the secret weapon here. I got mine as a wedding present seven years back, and it completely changed my bread game. That trapped steam makes the kind of crust you can't normally get at home. My grandma, who made bread every day growing up, couldn't believe this simple method worked better than her hours of kneading.
Fixing Common Problems
If your bread isn't rising well, first check if your yeast is too old. Even slightly expired yeast can mess everything up. Also pay attention to how warm your kitchen is—when it's cold, the dough works more slowly, so in winter you might need to wait up to 12 hours for it to develop properly.
Customizing Your Loaf
Once you've got the basic recipe down, you can play around with add-ins. My family goes crazy when I toss in 1/3 cup of mixed seeds like sunflower, pumpkin and flax at the beginning. Adding 2 tablespoons of dried rosemary or thyme makes a fragrant loaf that's perfect with soup. For something sweeter, mix in 1/4 cup honey and a handful of dried cranberries with your initial ingredients.
Ways To Enjoy It
This bread shows that basic ingredients and simple methods can create something truly outstanding. Make it part of your weekend routine and your family will look forward to it every time.
Recipe Q&A
- → Can I use all-purpose flour instead of whole wheat?
Sure, you can swap in all-purpose flour for a softer bread. Use the same amount (3-¾ cups or 460g), but you might need a bit less water. Want the best of both worlds? Try mixing half wheat and half all-purpose flour for a nice balance.
- → Why does the bread need to rise overnight?
The overnight rest lets natural processes break down the starches, creating better taste and making the bread easier to digest. This long waiting period also builds the bubbly texture without any kneading, as the stretchy gluten forms by itself during the long rest.
- → Do I need to preheat the Dutch oven?
Definitely! Warming up the Dutch oven first is super important. When the dough hits the hot pot, it makes steam right away, which gives you that amazing crust. The heated heavy pot also gives steady, strong heat that helps your bread puff up just right.
- → Can I add seeds or other ingredients to the dough?
You bet! Toss in up to ½ cup of goodies like sunflower seeds, crushed nuts, dried fruits, or herbs with your dry stuff before mixing. Want toppings? Just sprinkle seeds over your shaped dough right before baking.
- → How should I store the bread after baking?
Let your bread cool all the way down first. Then keep it on your counter in a paper bag or bread box for 2-3 days. Want it to last longer? Cut it into slices and pop them in the freezer in a sealed container for up to 3 months, then toast slices whenever you need them.
- → What if I don't have a Dutch oven?
While a Dutch oven works best, any oven-safe pot with a good lid will do the trick. Or you can bake on a heated baking stone or regular pan with a separate dish of water in the oven to make steam for that crispy crust.