
 Pin
Pin
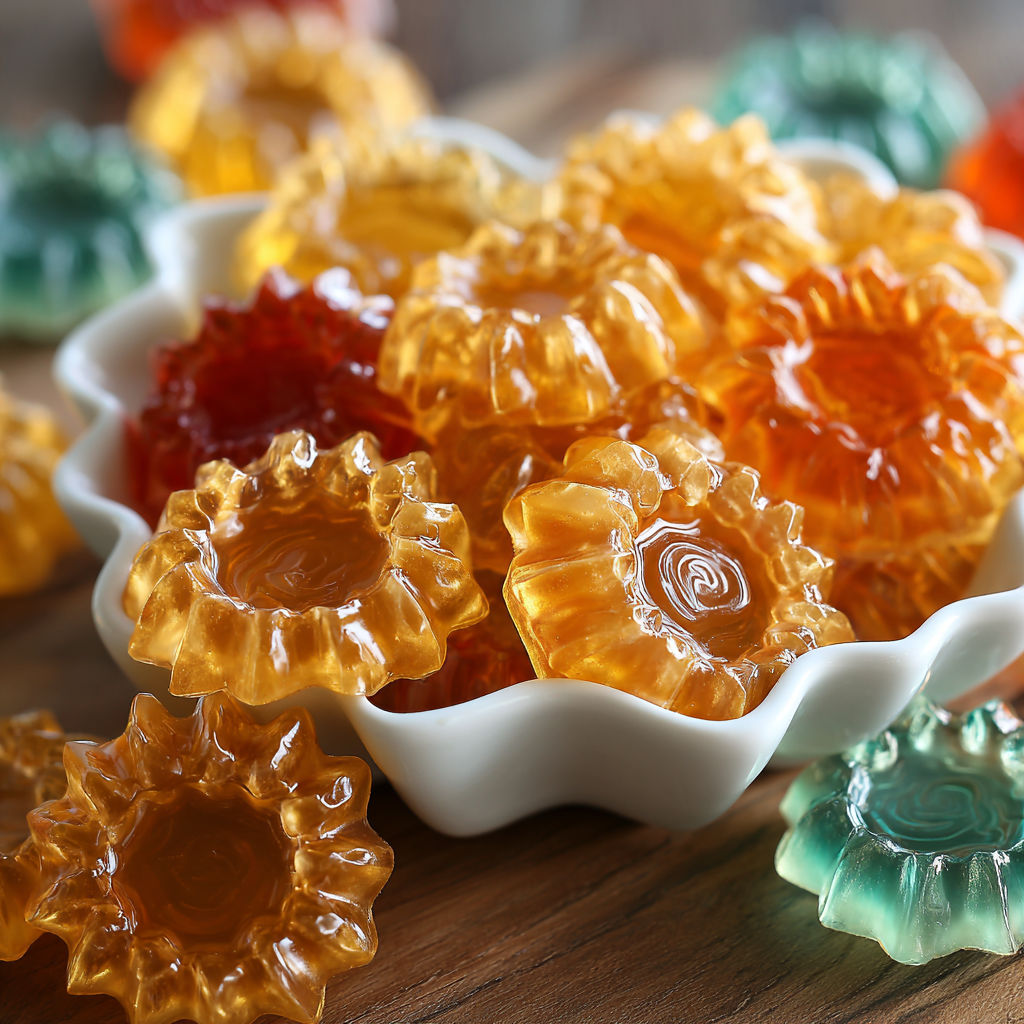
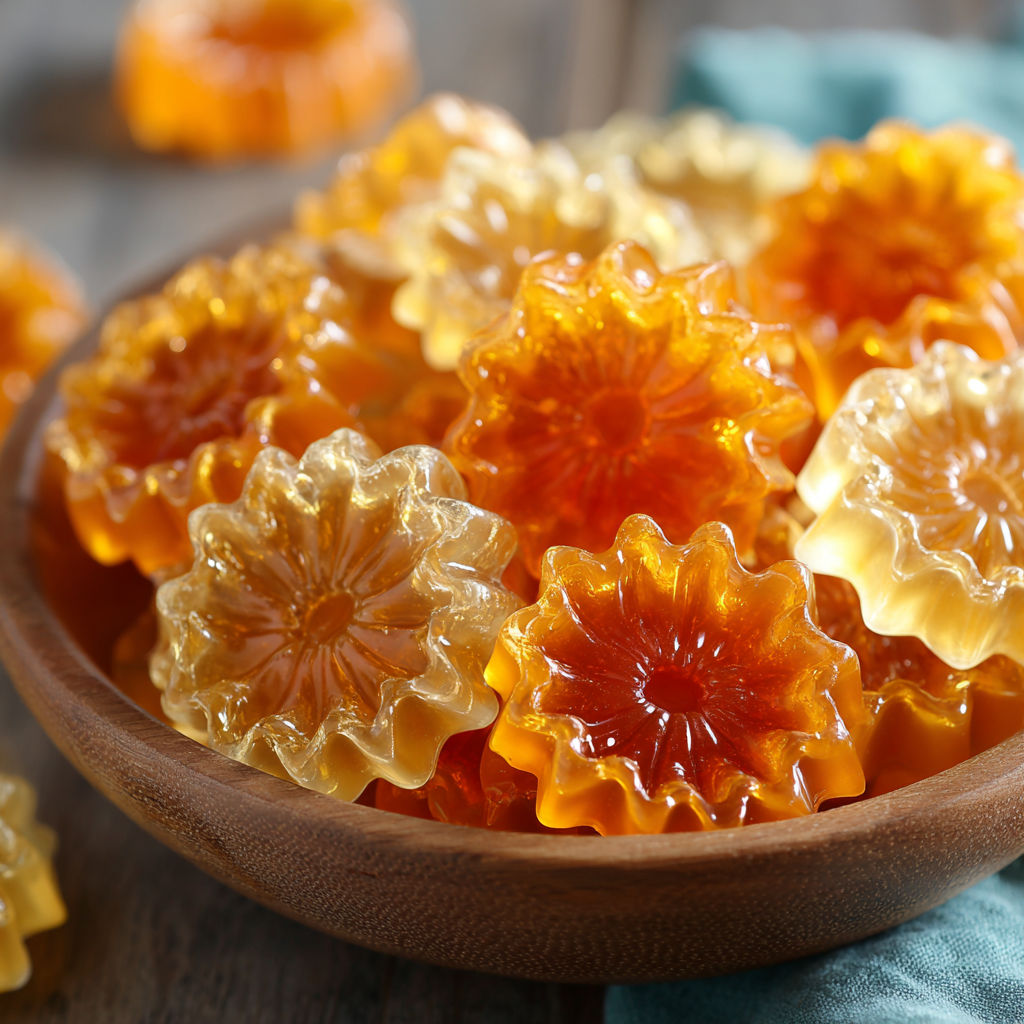
Sweet Treats Made Easy turns simple pantry staples into festive colorful candy melts that anyone can make without fancy equipment. These candies are perfect for parties homemade gifts or a fun kitchen project the whole family can enjoy. Each chewy bite is packed with fruity flavor and a glossy finish that always wows guests.
I whipped up my first batch for a rainy weekend with my niece and nephew and now they beg to make them every time they visit. Watching their faces as the candy set was my favorite part.
Ingredients
- Flavored Jello gelatin: Adds both flavor and vibrant color Choose any favorite flavor and look for a package with strong natural or artificial color for best results
- Granulated sugar: The backbone of candy making Gives structure and sweetness Opt for fresh un-clumped sugar
- Water: Helps dissolve the sugar and allows the mixture to reach a boil Use filtered water if possible for a clear candy
- Light corn syrup: Makes the candy smooth and glossy and prevents crystals from forming Choose a clear syrup for best color
- Citric acid (Optional): Adds a tangy note for a mouthwatering pucker Choose food-grade citric acid in small jars from the baking aisle
- Powdered sugar or cornstarch: Essential for dusting Keeps candy pieces from sticking together Use a fine powder for even coating
- Sprinkles (Optional): An easy way to add sparkle or match a party theme Pick bright or metallic types for a festive look
Instructions
- Prepare the Molds:
- Lightly grease your silicone candy molds for easy release. If you will cut the candies after they set line a baking sheet with parchment paper. Make sure the molds are fully dry before using.
- Mix the Ingredients:
- In a medium saucepan add the Jello mix granulated sugar water and corn syrup. Stir constantly over medium heat making sure all the sugar granules dissolve and the mixture turns thick and glossy.
- Boil the Mixture:
- Increase the heat to medium high once the sugar is dissolved. Attach or dip a candy thermometer into the side of your pan. Watch closely and do not stir as the mixture boils. Wait for the thermometer to show 250 degrees Fahrenheit which is the hard ball stage. This can take 10 to 15 minutes.
- Add Citric Acid:
- If you want a punchy tang sprinkle in citric acid once the mixture has hit temperature. Stir quickly and gently to distribute without splashing.
- Pour into Molds:
- Pour the hot candy mixture slowly and carefully into your prepared molds. If you are using a baking sheet spread the liquid evenly with a heatproof spatula to your desired thickness.
- Cool and Set:
- Allow your candy to fully cool at room temperature. Do not rush by refrigerating as this can cause condensation. Once firm the candy should pop out of the molds easily.
- Remove and Dust:
- Gently remove the candy from molds or cut it into shapes if using a sheet. Toss or dust lightly with powdered sugar or cornstarch making sure all sticky sides are covered.
- Decorate:
- If you like add sprinkles to the unset candy pressing gently so they stick. Do this before the candy is fully set to ensure they adhere.
- Serve:
- Once completely cooled and dusted store your candy melts in an airtight container at room temperature. Separate layers with parchment if stacking.
Candy making was my grandma’s special way to mark holidays and this recipe always reminds me of the bright trays she’d set out at Easter. My favorite part is sprinkling different colored Jello each time so every batch is a surprise for my family.
Storage Tips
Keep your candy melts in a tightly closed container at room temperature and use within a week for best chew. Place parchment between layers to avoid sticking. They do not need refrigeration and can pick up fridge odors if uncovered.
Ingredient Substitutions
No corn syrup Try glucose syrup or golden syrup for a similar glossy chewy result. You can swap Jello for unflavored gelatin with extra flavoring and food coloring but adjust sweetness to taste. Lemon or lime juice can substitute citric acid for a natural tang.
Serving Suggestions
Pile candy melts in cellophane bags for party favors or stack in pretty tins to give as holiday gifts. Try matching Jello flavors to party themes or coloring to school events. For birthdays I sometimes spell out names using letter molds.
Cultural and Historical Context
Homemade candies go back centuries with each culture having special treats for holidays. These Jello melts are a playful spin on old fashioned fruit jellies but use grocery store shortcuts and pantry staples to make candy accessible to anyone at home.
Seasonal Adaptations
Change up the Jello flavor for the season Think orange or cranberry at Thanksgiving pastel colors for springtime or red and green for Christmas Sprinkle with coconut or edible glitter after dusting for a wintry look Try heart or star shaped molds for occasions like Valentine’s Day or July Fourth

These chewy candy melts are a joyful treat any time of year. Enjoy their bright colors and fun texture with friends and family!
Recipe Q&A
- → What flavors work best for these sweet treats?
Any flavored gelatin, such as strawberry, cherry, or lime, will yield vibrant color and taste. Feel free to experiment!
- → How do I keep the candies from sticking together?
Lightly dust finished candies with powdered sugar or cornstarch before storing to prevent sticking.
- → Can I add a sour flavor to these candies?
Yes, adding citric acid to the mixture creates a tangy kick. Adjust quantity to taste preference.
- → Are silicone molds necessary?
Silicone molds offer easy release, but you can also pour the mixture onto a lined baking sheet and cut into shapes.
- → How should I store these treats?
Place cooled candies in an airtight container at room temperature to maintain texture and freshness.
- → When should I add sprinkles for decoration?
Press sprinkles into the surface while the candies are still soft but beginning to set for best results.