
 Pin
Pin
These playful witch hat crescent roll bites became our Halloween tradition the very first year I made them—the kids could not stop laughing at their little hats and I could not believe how quick they came together. They are perfect when you want something cute and festive but need it done in under twenty minutes.
Every time we put these on the table, the whole house smells like savory garlic and warm bread. Even picky eaters always reach for a second hat.
Ingredients
- Crescent roll dough: Gives you a flaky buttery base that bakes up golden and crisp so grab a can that feels cold and fresh at the store
- Butter, melted: Ties everything together and helps flavors stick—look for high quality unsalted for best flavor
- Garlic powder: Offers that classic pizzeria aroma and is easy to sprinkle evenly
- Dried parsley: Brings color and a herbaceous pop, use dried over fresh so it sticks well during baking
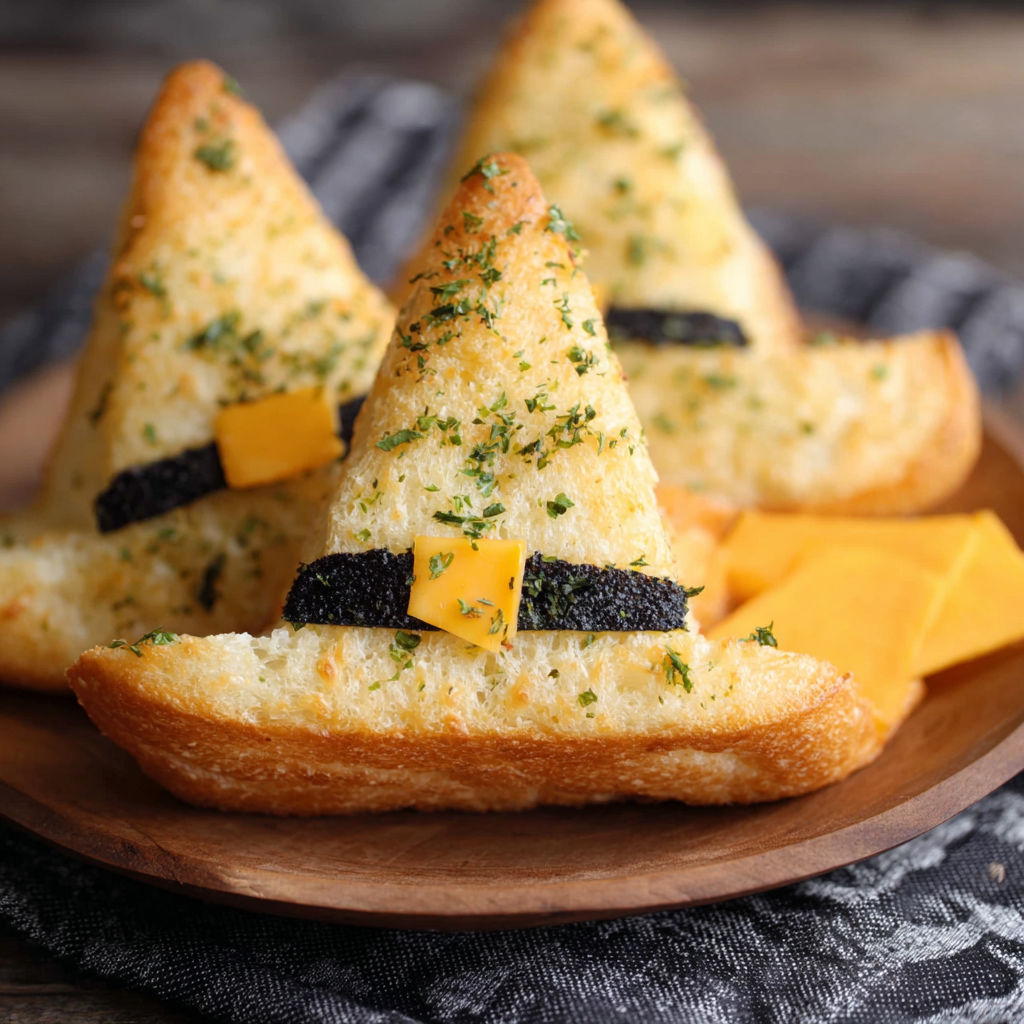
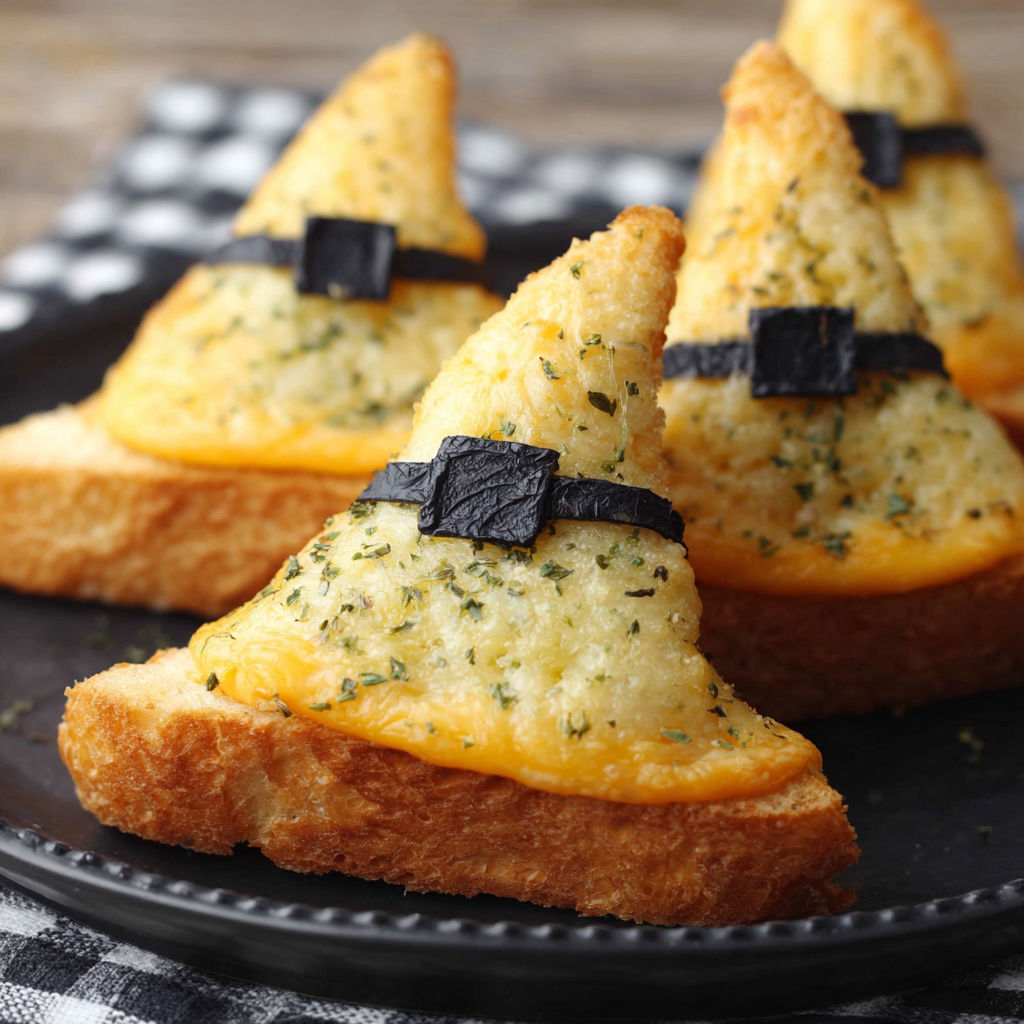
- Cheddar cheese: Adds the golden witch hat band, sharp cheddar holds shape nicely and melts just enough
- Sliced black olives: Make the perfect faux buckle on each hat, buy pre sliced to save extra steps
- Marinara sauce For a fun dipper on the side, optional but makes it extra festive
Instructions
- Prepare the Dough:
- Unroll the crescent roll dough and carefully separate it into eight triangles. Lay each triangle flat on an ungreased baking sheet with plenty of space around each piece so they crisp instead of steam.
- Season and Shape the Hats:
- Brush every triangle generously with melted butter using a pastry brush to make sure the tops and edges are coated. Sprinkle garlic powder evenly across the tops of the dough, followed by a light shower of dried parsley for speckled color. Take the straight edge of each triangle and fold it over by about half an inch to make a distinct hat brim. Press gently so it keeps shape.
- Bake to Golden Perfection:
- Slide the tray into your preheated oven set at 350 degrees. Bake for ten to twelve minutes. Watch closely after nine minutes so the hats do not brown too quickly—you want deep golden edges and a finished but still soft center.
- Add Cheddar Bands and Olive Buckles:
- Cut your cheddar cheese slice into eight very thin strips while the hats are still warm from the oven. Lay one strip across each hat just above the brim, trimming so it fits across the width of the point. Press a black olive slice onto the center of each cheese strip to look like a little buckle, then let the hats sit a minute or two until the cheese softens.
- Serve and Dip:
- Arrange hats on a big platter and offer a bowl of warm marinara sauce for dunking. The tomato dip takes these from fun to irresistible for anyone who loves pizza inspired flavors.

Great make ahead and reheat treat for busy hosting. Cheddar cheese for the band is always the best part for me, especially when it gets gooey just from the warmth of the fresh baked dough. One year my daughter decorated an extra hat with two olive eyes and started calling them wizard hats—you never know what fun little family tradition might start with these.
How to Store Leftovers
Store any uneaten witch hats in an airtight container at room temperature the first day. For longer storage keep in the fridge for up to three days. Warm them in the oven at 300 degrees for about five minutes to refresh before serving.
Swapping Ingredients
You can try mozzarella cheese strips if cheddar is not on hand or even use a mild brick cheese for something different. If someone prefers no olives, use a tiny cut ring of sweet bell pepper for the buckle look instead. Any basic pizza or bread dip can stand in for the marinara.
Serving and Pairings
Set these hats out on a platter surrounded by more finger food like veggie sticks or pretzel broomsticks for instant Halloween charm. They pair perfectly with a big seasonal salad or a batch of spiced apple cider for balance.
Bringing in Halloween Magic
This recipe comes from that sweet spot between easy enough for weeknight fun and still special for the biggest spooky party. Let kids help with sprinkling parsley or placing the olive buckles and watch their creative side come out. Witch hats always disappear first from our party platter without fail.
Seasonal Adaptations
Make a turkey version in November by adding a little piece of turkey sausage under the cheese band. Switch to pesto as a green dipper for a ghoulish twist. Add smoked paprika to the butter for a deeper color and flavor pop.
Success Stories
Last year a neighbor dropped by and left with the entire plate asking for the recipe for their own Halloween night. Friends have told me these are now their youngest child’s favorite part of trick or treating—they ask for hats before candy. For a school party I doubled the batch and not a single hat came home.
Freezing Tips
If you want to make these in advance they freeze well. Layer cooled hats between parchment and keep them in a zip top bag. Bake direct from frozen for about seven minutes at 325 degrees until hot and crisp.
Witch hat crescent bites are sure to bring lots of giggles to your Halloween table and are always the first thing to vanish at parties. Enjoy how simple, fun, and crowd pleasing they are this spooky season.
Recipe Q&A
- → What type of dough should I use?
Use refrigerated crescent roll dough for the best texture and easy shaping when creating the witch hats.
- → Can I substitute the cheddar cheese?
Yes, you can use any cheese that slices easily, such as mozzarella or Swiss, for decorating the hats.
- → Are black olives necessary?
Black olives provide a decorative touch but can be omitted or replaced with small pepper rounds or pimento strips.
- → Is marinara sauce required?
Marinara adds a flavorful dip but is optional—these savory bites are delicious on their own or with your favorite sauce.
- → How do I keep the cheese in place?
Add the cheese while the hats are slightly warm so it melts just enough to secure around the brim.