
 Pin
Pin
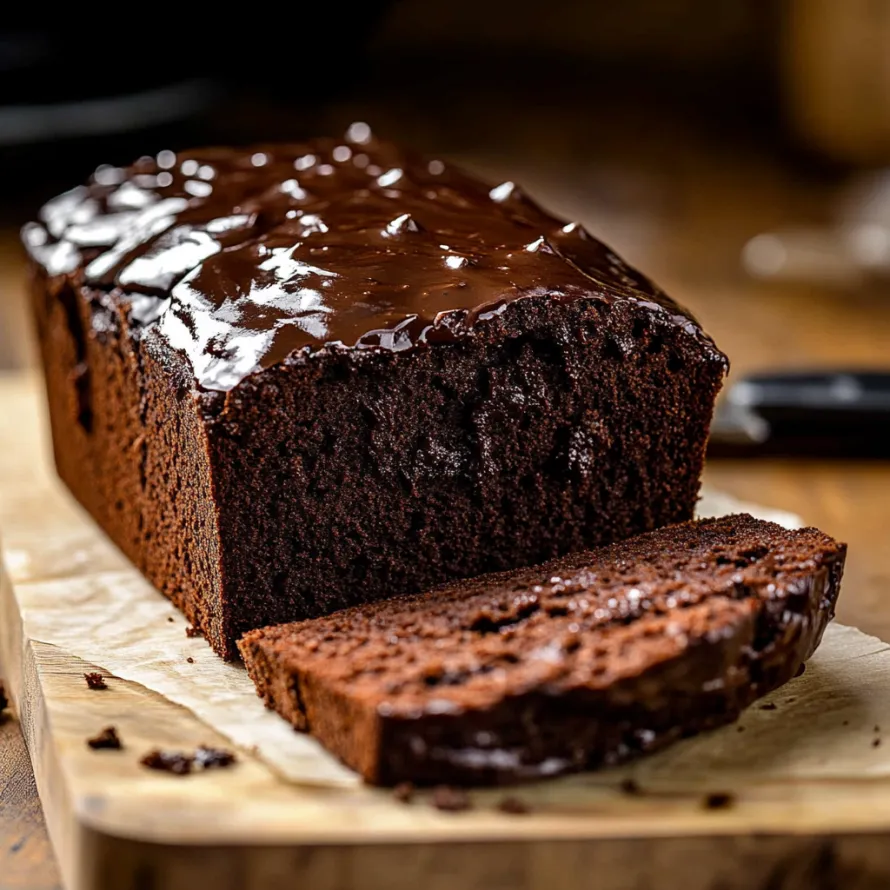
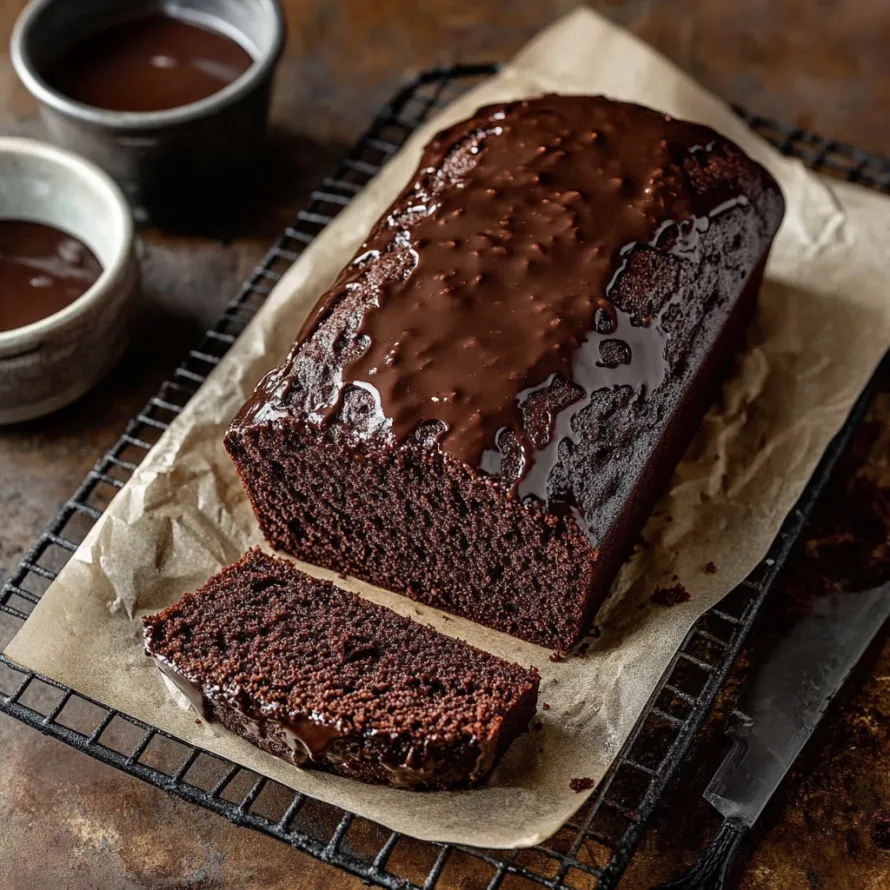
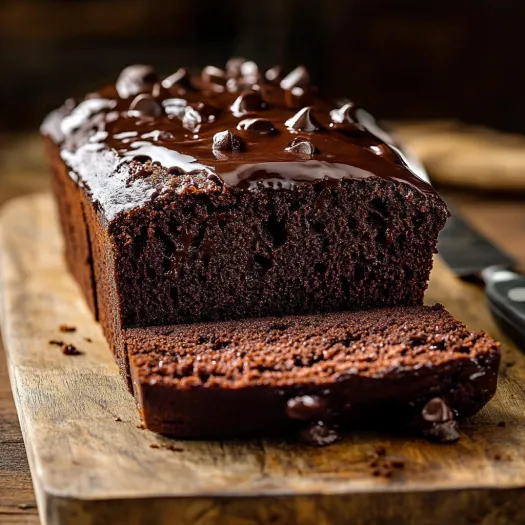
This luscious chocolate loaf combines the gooey texture of brownies with the simple shape of a quick bread. Every chocolate fan will drool over this treat that blends melty chocolate with cocoa for an incredibly rich taste that stays soft for several days.
I came up with this mix during a cold-weather baking spree when my folks asked for "something other than basic brownies." When this bread bakes, the aroma takes me back to that snug weekend, and it's now what we grab whenever we need a chocolate fix.
What You Need
- 1 cup milk chocolate chips: Mixed in the batter they create yummy melted spots throughout
- 1 ¼ cups all purpose flour: Gives the right body without making it too fluffy
- ½ cup Dutch processed cocoa powder: Makes a richer chocolate taste than regular cocoa
- ¼ teaspoon baking soda: Adds a bit of lift while keeping it dense
- 1 teaspoon kosher salt: Brings out all the chocolate goodness
- 3 large eggs: Should be warm for better mixing and softer texture
- 1 ¼ cups granulated sugar: Sweetens up the dark chocolate flavors
- ½ cup vegetable oil: Helps the bread stay soft days after baking
- ¾ cup water: Makes the batter just right for perfect texture
- ½ cup milk chocolate chips: For topping pick good ones for the smoothest result
- ¼ cup heavy cream: Need the full-fat kind for proper setting
Easy Instructions
- Get Ready:
- Set your oven to 325°F. This temp lets the bread cook all the way through without getting dry. Cover a 9x5 inch metal loaf pan with cooking spray, getting every bit of the inside.
- Prepare The Chocolate:
- Put chocolate chips in a bowl that's safe for the microwave. Warm them in 30 second bursts, stirring after each until totally smooth. Let it cool a bit so it won't cook your eggs when mixed.
- Mix Dry Stuff:
- In another bowl, stir together flour, cocoa, baking soda, and salt until well mixed. Stirring breaks up clumps and spreads the baking soda evenly through the bread.
- Start The Mix:
- Using your stand mixer with the paddle, beat eggs and sugar for 5 full minutes until it turns light yellow and grows in size. This long mixing puts air in the batter for the right feel.
- Make The Batter:
- With the mixer on slow, add your melted chocolate, oil, and water. Mix until it looks shiny and smooth. Slow speed keeps all that air from escaping the egg mixture.
- Put It All Together:
- Slowly add your dry mix to the wet mix, stirring just enough to get rid of lumps. Too much mixing now can make your bread tough and chewy.
- Bake It:
- Pour your batter into the pan and bake for 85 to 90 minutes. This long time makes sure the middle sets while giving a slightly crisp outside. Check with a toothpick which should have a few crumbs but no wet stuff.
- Let It Rest:
- Cool the bread in its pan for at least 2 hours before trying to take it out or top it. This rest time lets it firm up and flavors get better.
- Make The Topping:
- Put chocolate chips in a bowl that can take heat. Warm up cream in a pot until tiny bubbles form at the edges. Pour the hot cream over chocolate and don't touch it for 2 minutes before gently stirring until smooth.
- Add The Topping:
- Let the chocolate mix cool and thicken a bit before pouring it on the bread. It should pour but not be so hot it soaks in. Wait 10 to 15 minutes before cutting.
This sweet treat reminds me of what my grandma used to bake but with stronger flavor. The Dutch cocoa really makes it stand out with a deep taste you just can't get from normal cocoa powder. I can still picture my chocolate-crazy uncle asking for my recipe before he'd even finished his first piece at our family dinner.
How To Keep It Fresh
Keep your loaf in a sealed container at room temp for up to 4 days. The oil in the mix helps it stay moist. For longer keeping, wrap single slices in plastic then foil before freezing up to 3 months. Let frozen slices thaw in your fridge overnight for the best taste.
Great Combos
This chocolatey bread gets even better with the right sides. Try heating a slice for 15 seconds then adding a scoop of vanilla ice cream for a hot-cold mix. Some whipped cream and fresh raspberries cut through the richness really well. If you love coffee, having a slice with your morning cup makes you feel like you're at a fancy café.
Fixing Problems
Don't worry if your loaf dips a bit in the middle after baking, that's normal for such a rich, fudgy bread. If it sinks a lot, your oven might be too hot so check with a thermometer. For clean slices, use a sharp knife dipped in hot water and wiped between cuts. If your topping seems too thick, add warm cream a teaspoon at a time until it looks right.
Your family will ask for this treat again and again—it's a rich, chocolatey delight perfect for any time!
Recipe Q&A
- → Can I use dark chocolate instead of milk chocolate?
Absolutely, dark chocolate works great as a swap in both the bread and topping. This swap gives you a stronger, less sweet chocolate kick. Semi-sweet chips make a nice middle option if you can't decide.
- → How should I store brownie bread?
Keep your bread in a sealed container at room temp for up to 3 days. Want it to last longer? Pop it in the fridge for up to a week. You can even wrap slices in plastic and foil to freeze them for up to 3 months.
- → Why did my brownie bread sink in the middle?
Sinking happens when bread isn't baked long enough, your oven runs too hot, or you peek by opening the door too early. Always check doneness with a toothpick and let it cool completely in the pan before you take it out.
- → Can I make this without a stand mixer?
Sure thing, a hand mixer does the job too. You might need to beat the eggs and sugar a bit longer to get them fluffy. In a pinch, a whisk works fine but needs more muscle power from you.
- → What can I add to enhance the brownie bread?
Try tossing in some chopped walnuts or pecans, extra chocolate chunks, a dash of espresso powder to boost the chocolate flavor, or a splash of vanilla. Want something different? Add a tiny bit of peppermint extract for a cool twist.
- → How do I know when the brownie bread is done baking?
Stick a toothpick in the middle - you want a few moist crumbs but no wet batter. The top should look set with small cracks, and the edges should start pulling away from the pan sides.