
 Pin
Pin
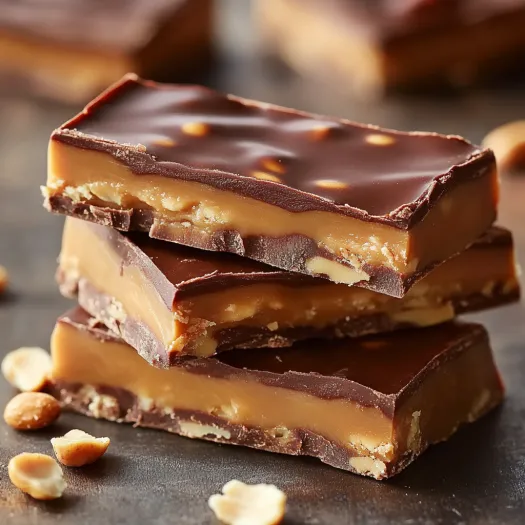
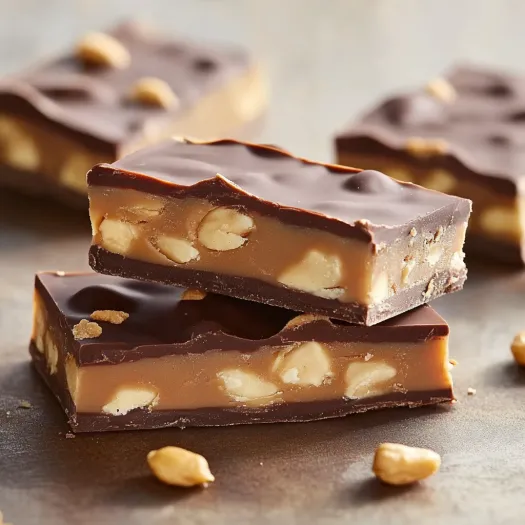
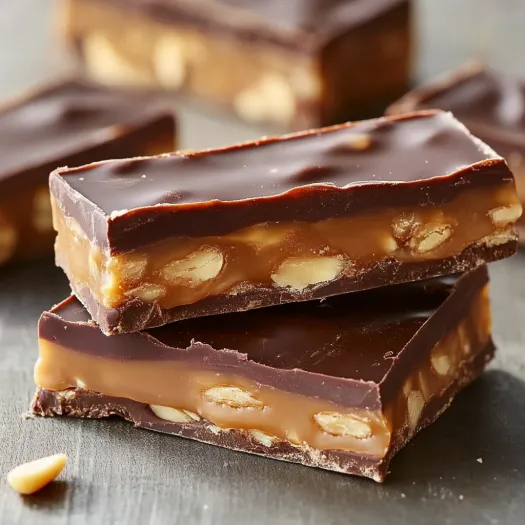
Whip up this melt-and-layer chocolate, peanut and caramel treat that mimics the taste of your favorite store candy bar. This homemade creation stacks velvety chocolate, soft nougat, crunchy nuts and sticky caramel into something way better than anything you'd grab off a shop shelf.
I threw these together for my nephew's party when his favorite candy was nowhere to be found. Funny thing is, the grown-ups gobbled them all up before any kids could try them, and now everyone begs me to bring them to family get-togethers.
Ingredients
- Chocolate chips: Form the rich base and shiny top coat. Go for chips with at least 60% cocoa for deeper flavor notes.
- Butterscotch chips: Add that warm, sugary kick to the bottom layer. Their honey-like sweetness really lifts the whole dessert.
- Creamy peanut butter: Works in several layers to bring nutty taste and hold everything together. Stick with brands like Skippy or Jif for best results.
- Marshmallow crème: Makes that fluffy nougat section. Check that it's soft and squishy for the right texture.
- Salted cocktail peanuts: Give that needed snap and salty balance. Chop them roughly but keep chunks big enough to see and taste.
- Caramels: Ready-to-use store caramels work perfectly. Pick ones that feel soft to touch without any hard spots.
- Heavy whipping cream: Makes both nougat and caramel layers extra smooth. The fat stops sugar from getting grainy.
Step-by-Step Instructions
- Prepare the Pan:
- Put parchment in your 13x9-inch pan with extra hanging over the sides so you can lift everything out later. Push it into all the corners and smooth out any folds for flat layers.
- Create the Foundation:
- Mix chocolate chips, butterscotch chips and peanut butter in a bowl you can microwave. Heat in short bursts, mixing well between each until it's completely smooth. Pour this shiny mix into your lined pan and spread it out evenly to all edges. It should be about 1/8 inch thick. Chill until firm, around 30 minutes.
- Craft the Nougat Layer:
- Mix sugar, butter and cream in a pot and bring to a gentle boil over medium heat. Keep it bubbling for exactly 5 minutes, stirring the whole time so nothing burns. This timing gives the perfect soft bite. Take it off the heat and quickly mix in marshmallow fluff, peanut butter and vanilla before it starts setting. Add chopped peanuts, mixing well, then spread this fluffy stuff over your cold chocolate base. Chill again for 30 minutes.
- Add the Caramel Layer:
- Put unwrapped caramels and cream in a bowl you can microwave. Heat carefully, stirring now and then until totally melted and smooth. It should be thick but still easy to pour. Quickly spread this warm caramel over the cold nougat layer before it hardens. Chill another 30 minutes.
- Finish with Chocolate Topping:
- Mix the last of your chocolate chips and peanut butter in a bowl and melt like before until completely smooth. Pour over the caramel and spread into a thin layer reaching all sides. Chill at least an hour before cutting into squares.
That fluffy marshmallow layer really makes these treats stand out from regular candy bars. When I first made them, my daughter thought they were so much better than anything from the store that she made me promise to keep our recipe secret for years!
Storing Your Candy Bars
These treats need to be kept cold so the layers stay perfect and the chocolate doesn't melt. Pop them in an airtight container with parchment between layers so they don't stick together. They'll stay fresh in the fridge for two weeks, though at my house they vanish way faster! If you want to keep them longer, freeze for up to three months. Just let them thaw in the fridge before eating.
Making Ahead and Gifting
These squares work great as presents since you can make them days before you need them. For gifts, wrap each piece in wax paper or candy foil and pack them in pretty boxes or tins. I usually double the batch during Christmas and pack up nice gift sets for people who live nearby. Just keep them cold until right before giving them away and tell folks to put them in their fridge when they get home.
Clever Variations
The standard recipe tastes amazing but you can switch things up easily. Try swapping peanuts for almonds or cashews. For fancier flavor, use dark chocolate or mix in a bit of espresso powder with the chocolate layers. Around Christmas I sometimes sprinkle crushed candy canes on top or mix toffee bits with the nuts. You can play around with it lots of ways while keeping that classic candy bar feel.
Enjoy them slightly chilled for the best taste and texture—they're a hit with both kids and grown-ups!
Recipe Q&A
- → Can I use different types of chocolate chips for this recipe?
Absolutely! You can pick semi-sweet, milk, or dark chocolate chips depending on what you like best. You can even try mixing different kinds for a more interesting taste.
- → How should I store these candy bars?
Keep them in a sealed container in your fridge. The layers, especially the caramel part, will get too soft if left out at room temperature.
- → Can I substitute the marshmallow creme?
Don't have marshmallow creme? You can make your own by heating about 2 cups of mini marshmallows with 2 tablespoons of corn syrup in the microwave and stirring until it's all smooth.
- → Why do I need to chill between layers?
You've got to chill between layers so they don't mix together. Each layer needs to get firm before you add the next one to keep them separate in your finished bars.
- → Can I make these bars without peanuts for allergy concerns?
For folks with peanut allergies, swap the peanut butter with almond or sunflower seed butter. You can also replace peanuts with crunchy things like crispy rice cereal, broken pretzels, or other nuts if those aren't a problem.
- → How far in advance can I make these bars?
You can make these bars up to 5 days ahead if you keep them in the fridge properly covered. For the neatest edges, you might want to cut them right before you serve them.