
 Pin
Pin
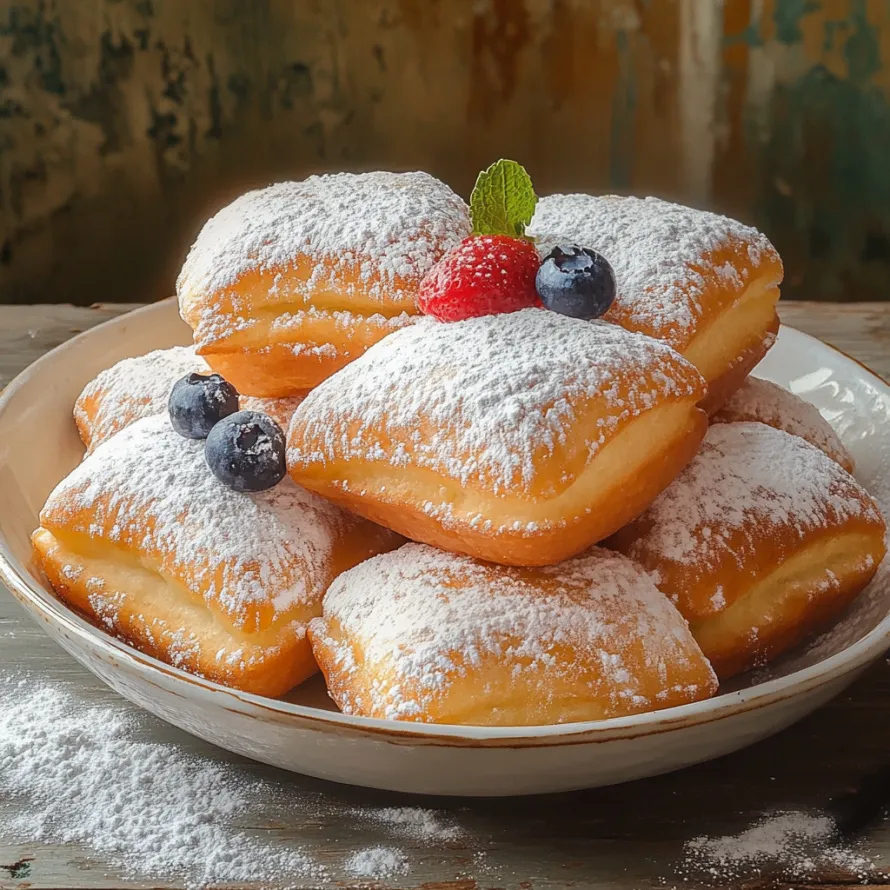
These fluffy French pastry puffs turn everyday cabinet items into cloud-like, amber treats showered with confectioner's sugar. The airy, light goodies bring a bit of New Orleans cafe vibe straight to your home with little work but tons of enjoyment.
I first whipped up these pastry puffs during a Mardi Gras party with my buddies, and they vanished quicker than I could sprinkle sugar on top. They've now turned into our go-to Sunday morning treat when we want something fancy without messing with yeast dough waiting times.
What You'll Need
- All purpose flour: Makes up the base of these puffy treats, giving them shape while keeping them soft
- Baking powder: Gives that nice lift that makes these goodies puff up beautifully in hot oil
- Salt: Brings out all the tastes and cuts through the sweetness
- Granulated sugar: Adds just the right touch of sweetness to the mix without going overboard
- Large egg: Holds everything together and adds to the rich feel
- Vanilla extract: Puts warm, nice flavor throughout every bite
- Whole milk: Makes the dough tender grab full fat for best results
- Unsalted butter: Adds a rich taste and helps get that golden outside
- Vegetable oil: For cooking; pick one that can get really hot without smoking
- Powdered sugar: For that classic sweet finishing touch; don't be shy when dusting
Delightful Instructions
- Mix Dry Stuff Together:
- In a big bowl, stir the flour, baking powder, salt, and sugar until they're fully mixed. This helps your pastry puffs rise evenly and taste good all the way through. Make sure to break up any flour clumps for the smoothest dough possible.
- Blend Wet Stuff:
- In another bowl, beat the egg until it's a bit foamy, then add in vanilla, milk, and melted butter. The butter should feel warm but not super hot so it won't cook the egg. Stir until everything looks smooth and a bit shiny from the butter.
- Put Everything Together:
- Pour your wet stuff into your dry stuff and mix with a wooden spoon. Stir just until you can't see dry spots and everything comes together. Too much mixing will make your pastries tough, so stop once everything's just blended. The dough should pull away from the bowl sides but stay soft and a bit sticky.
- Get Oil Ready:
- Fill a deep pan with vegetable oil about 2 inches up the sides. Heat until it reaches 350°F, using a thermometer to check. Getting the right heat matters a lot; too cool and your puffs soak up too much oil, too hot and they burn outside before cooking inside.
- Cook The Puffs:
- Use a spoon or small scoop to drop bits of dough into the hot oil. Don't crowd the pan work with 4 or 5 puffs at once. The dough will start to puff up right away. Let them cook for 2-3 minutes until deeply golden, then flip them gently and cook another 2 minutes until they're evenly brown all over.
- Dry And Dust:
- Use a slotted spoon to lift the cooked puffs onto paper towels to soak up extra oil. While they're still hot, sprinkle loads of powdered sugar on top using a small strainer for even coverage. The heat helps the sugar stick to the surface.
- Enjoy:
- Put the puffs on a plate and eat them right away while they're warm. They go great with coffee, especially cafe au lait, or hot chocolate for a true French feel.
The vanilla in this mix is really the hidden gem. While many cooks just put in a drop, I found that a whole teaspoon creates this amazing smell that turns these simple puffs into something special. My grandma always told me good vanilla changes everything in baking, and these pastry puffs prove she was right every single time.
Getting Oil Just Right
Keeping your oil at the right heat is probably the most important part of making perfect pastry puffs. Too cold and they'll soak up too much oil and end up heavy and greasy. Too hot and they'll burn outside while staying raw inside. I like to use a candy thermometer clipped to my pan to watch the temperature all the time. After each batch, let the oil sit for a minute or two to get back to 350°F before adding more dough. This steady temperature makes sure each puff gets that trademark golden outside with a light, fluffy inside.
Do Some Work Early
While these puffs taste best fresh and warm, you can get some stuff ready ahead of time to make it easier. You can mix all the dry stuff and keep it in a sealed container for up to a month. The finished dough can be mixed, covered tight with plastic wrap, and kept in the fridge for up to 24 hours. Let it warm up for about 30 minutes before cooking. I often mix the dough the night before a special breakfast, which makes morning cooking quick and easy while still giving that just-made taste.
Change It Up
The basic vanilla puff is amazing, but this handy recipe works well with creative twists. Try adding lemon or orange peel; fresh citrus adds a bright, nice smell. A bit of cinnamon or nutmeg in the dough brings warm, spicy notes perfect for fall get-togethers. If you love chocolate, toss in mini chocolate chips just before cooking for melty pockets of sweetness. My favorite change includes 1/2 teaspoon of almond flavor along with the vanilla, which makes an amazing taste combo that reminds me of French bakeries.
Enjoy these golden, light pastry puffs while they're still warm for an amazing treat that'll take you right to the streets of New Orleans.
Recipe Q&A
- → Can I make the beignet dough ahead of time?
You can definitely make the dough up to a day before and keep it in your fridge wrapped tightly. Just let it sit out for about 30 minutes to warm up before you start frying for the best outcome.
- → Why did my beignets turn out dense instead of fluffy?
Beignets get dense when you stir the dough too much or if your oil isn't hot enough. Just mix until everything comes together and make sure your oil stays around 350°F (175°C) the whole time you're cooking.
- → Can I use a different type of milk?
Whole milk gives you the best flavor and texture but you can swap in 2% milk or plant milks like almond or oat. Just know that each different milk will change how your beignets taste and feel a bit.
- → How do I know when the oil is at the right temperature?
No thermometer? No problem. Just drop a tiny bit of dough in the oil. It should start bubbling right away and float up but not get dark too fast. Your beignets should take about 2-3 minutes on each side to get nice and golden.
- → How long do beignets stay fresh?
Beignets taste way better when you eat them right after cooking while they're warm. You can keep them in a sealed container for a day or two at room temperature but they won't be crispy anymore. Pop them in a 300°F oven for a few minutes to get some crunch back.
- → Can I freeze the beignet dough?
You can freeze the dough for up to a month. Cut it into portions before freezing then let it thaw completely in your fridge. Make sure it warms to room temperature before you fry it.