
 Pin
Pin
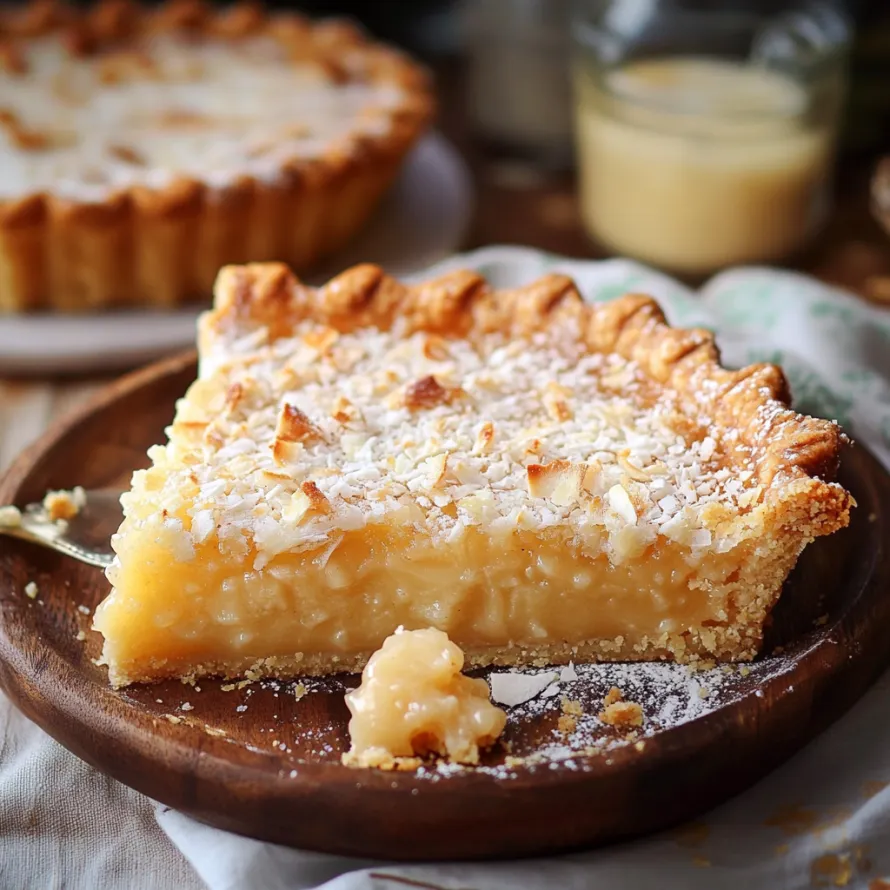
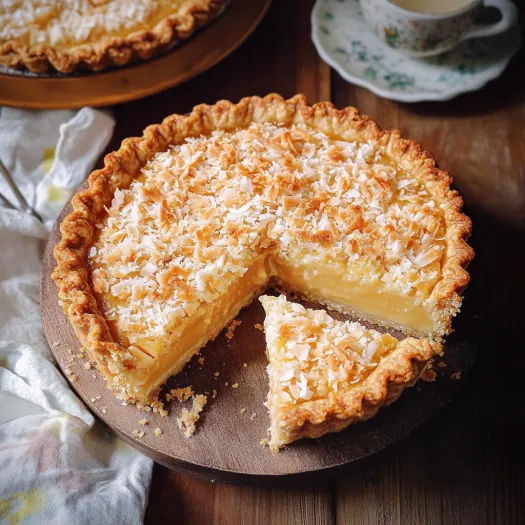
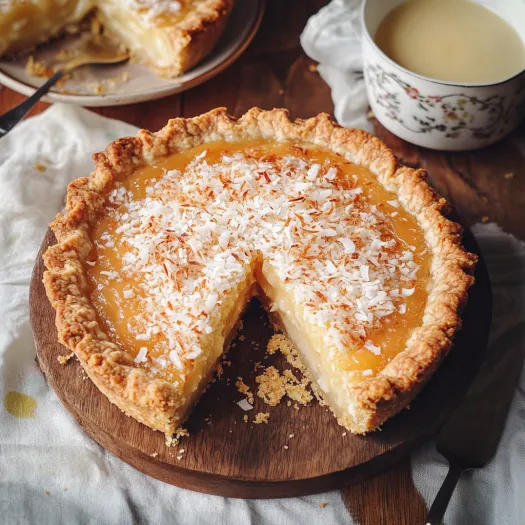
This dreamy French Coconut Pie with Dulce de Leche blends sweet caramel and tropical coconut in a flaky, buttery shell. It's a tasty mix of familiar comfort and exotic flair, just right for fancy gatherings or when you want to spoil yourself with something truly delicious.
I whipped up this pie for my sister's birthday party, and now it's the dessert my friends always ask for at our get-togethers. There's something magical about how the sweet, golden dulce de leche plays off the coconut mixture—it never fails to get rave reviews.
Ingredients
- Unsalted butter: Makes our crust extra rich and flaky, grab the good stuff if you can
- Granulated sugar: Gives just the right sweetness to both the shell and filling
- Vanilla extract: Brings warmth and flavor, go for pure vanilla instead of the fake kind
- Egg yolks: Add richness and help everything stick together in the crust
- All-purpose flour: Creates the base for our crust, unbleached works best
- Dulce de leche: Adds that yummy caramel layer that goes so well with coconut, store brands work fine
- Unsweetened shredded coconut: The main player in our pie, give it a quick toast to boost flavor
- Eggs: Help the filling set up and hold its shape
- Honey: Adds a nice twist and helps the top turn golden when baked
- Whipping cream: Keeps everything moist and balances the coconut texture
- Icing sugar: Gives that pretty dusted look before serving
- White coating chocolate: Creates cute little decorations that make the pie look fancy
Step-by-Step Instructions
- Prepare the Dough:
- Start by beating the soft butter with sugar and vanilla in your mixer using the paddle. Mix for about 3 minutes until it's fluffy and light. Drop in egg yolks one by one, making sure each gets mixed in well before adding another. You'll notice it turn a light yellow color. Then add your flour and mix just until it comes together. Don't overdo it or your crust will end up tough.
- Chill the Dough:
- Form the dough into a flat disc with your hands. Wrap it up tight in plastic and pop it in the fridge for at least half an hour. This break lets the dough relax and firms up the butter, which makes it easier to roll out and gives you a flakier crust.
- Roll and Form the Crust:
- Take your cold dough out and work it a bit on a floured counter to soften it up. Roll it out to about 1/8 inch thick in a circle that's a couple inches bigger than your pan. Lift it by wrapping it around your rolling pin, then unroll it over your tart pan. Push it into the corners and sides, trim off extra dough, and poke the bottom a few times with a fork so it doesn't bubble up.
- Create the Filling:
- In a big bowl, whip up eggs with sugar, honey, and vanilla using your mixer's whisk. Keep going until it gets thick and pale, almost forming ribbons when you lift the whisk. This takes about 5 minutes on medium-high. Then gently fold in your coconut and cream with a spatula, being careful not to knock out all the air.
- Assemble and Bake:
- Spread your dulce de leche in an even layer on the bottom of your frozen crust. The cold crust keeps the caramel from soaking in. Pour your coconut mix on top, trying not to mess up the caramel layer. Even out the top with your spatula. Bake at 340°F for around 40 minutes. You'll know it's done when the top turns golden and the filling doesn't wiggle when you give the pan a little shake.
- Decorate:
- After the pie cools completely, get your decorations ready. Melt the white chocolate in short microwave bursts, stirring between each. Put it in a small piping bag or make your own cone from parchment. Pipe little flowers onto a silicone mat or parchment and quickly put a gold pearl in each center before they harden. Let these set completely. Just before you serve, dust the pie with powdered sugar through a strainer and place your chocolate flowers on top.
What I love most about serving this dessert is watching people take that first bite. The layers look pretty on the plate and then hit your taste buds one after another. The dulce de leche part is my favorite touch—it turns what could be an ordinary coconut pie into something really special.
Make Ahead Tips
This pie actually tastes better the next day. Let it sit in the fridge overnight and all those flavors will mix together beautifully. If you're making it ahead, wait to add the sugar dust and chocolate decorations until just before you serve it so they look their best. You can keep the baked pie in the fridge for up to 5 days if you cover it loosely with foil to protect it.
Smart Substitutions
Can't find dulce de leche? You can cook a can of sweetened condensed milk in water for 3 hours to make your own, or just use caramel sauce instead. Need a dairy-free version? Try coconut cream instead of whipping cream and plant butter for the crust. In a hurry? A store-bought crust will work, though the homemade one really does taste way better.
Serving Suggestions
This pie stands on its own, but adding a scoop of vanilla ice cream or some fresh whipped cream makes it even better. Want to go all out? Serve each slice with a little pitcher of warm dulce de leche for guests to pour over their piece. A tiny pinch of sea salt flakes on top creates an amazing sweet-salty combo that brings out those caramel notes.
This pie will surely be the star of any dinner party or celebration you bring it to.
Recipe Q&A
- → How can I make dulce de leche at home?
Of course! If you don’t want to use store-bought dulce de leche, you can make your own by simmering an unopened can of sweetened condensed milk in water for a few hours. Alternatively, use a pressure cooker for faster results—about 40 minutes. Just make sure the can stays fully covered in water while it cooks.
- → What can I use instead of unsweetened coconut?
No unsweetened coconut? Sweetened flakes work too—just cut back on the sugar in the recipe by about 30g. You could also use desiccated coconut, though the texture will change slightly. Toasting either adds extra flavor!
- → Can I prep this tart ahead of time?
Sure thing! The crust can be made a day or two before and kept in the fridge. The whole tart is best prepared a day prior to serving—just save the powdered sugar and decorations for the last moment so they stay fresh-looking.
- → How should I store leftovers?
Keep leftover tart in an airtight container in the fridge, where it’ll stay good for about 3-4 days. Let slices sit out to warm up a bit before eating, or enjoy them cold. You can also freeze it for a month—just make sure it’s wrapped up well.
- → How can I tell when the tart’s ready?
Check for a golden top and a filling that stays put when you gently shake the pan. A knife inserted near the middle should come out mostly clean, with just a few crumbs but no wet spots.
- → Can I swap chocolates for the decorations?
Definitely! White coating chocolate works great, but if you prefer regular white, add a bit of shortening to help it set. Dark or milk chocolate decorations also look awesome paired with the light tart.