
 Pin
Pin
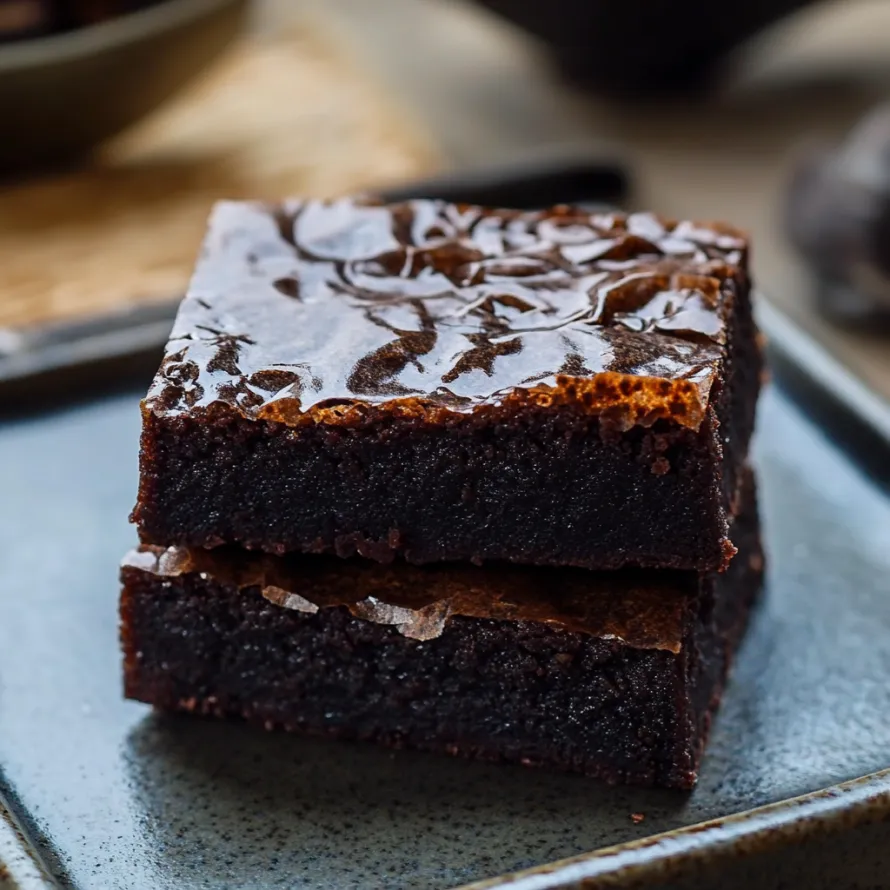
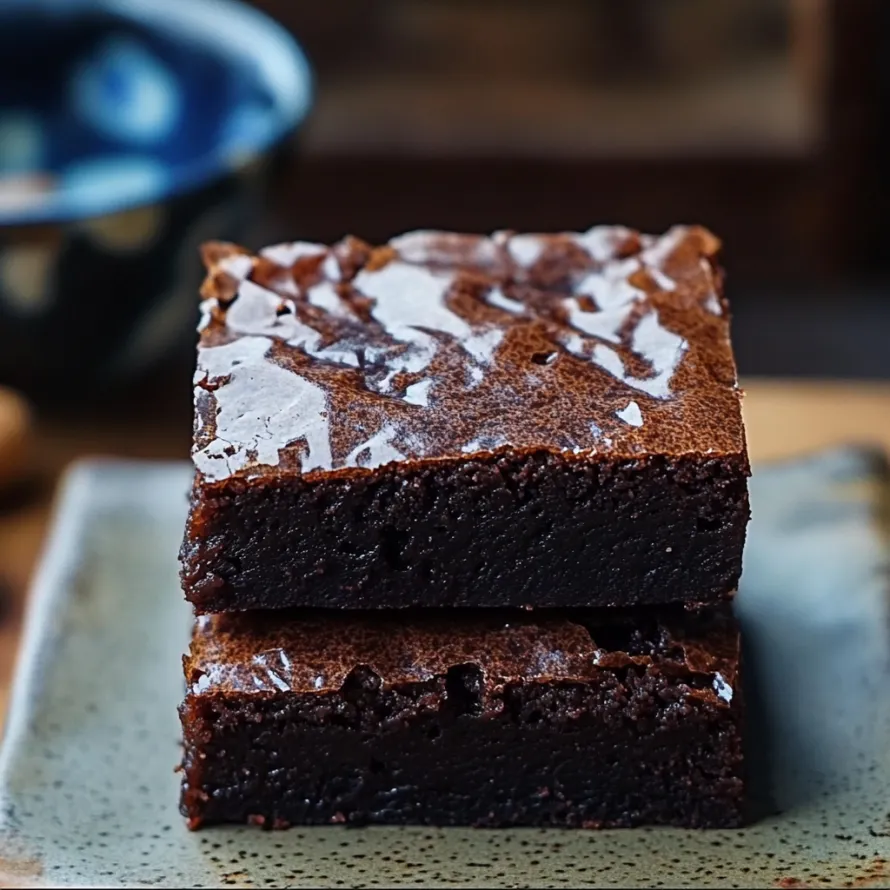
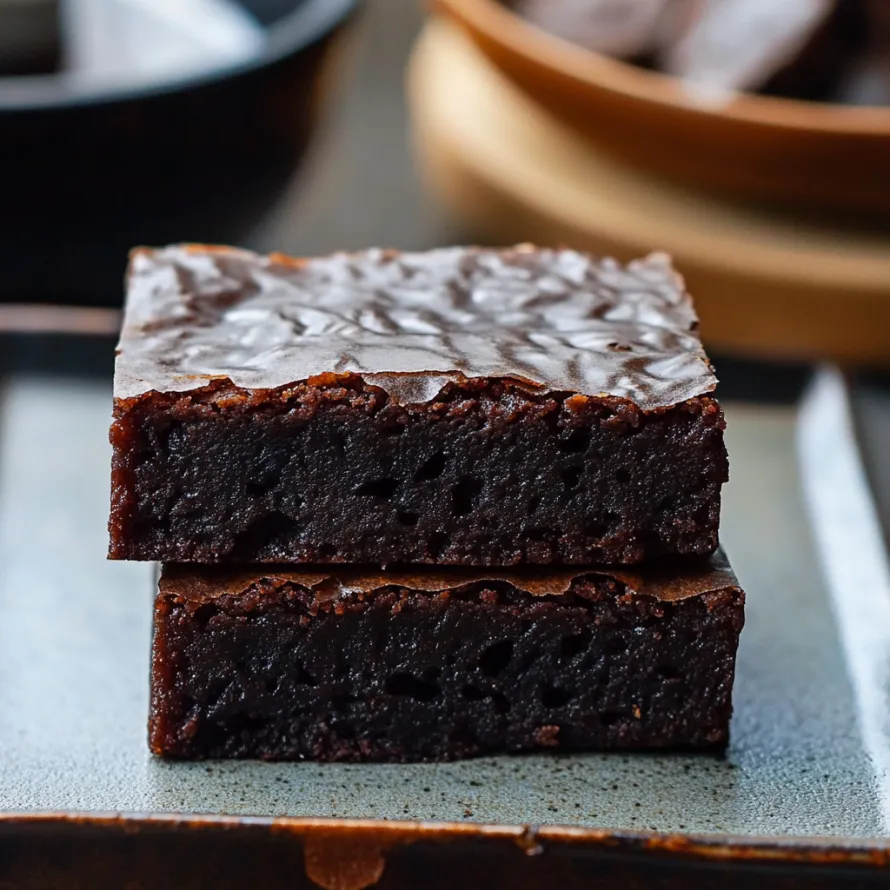
These stretchy mochi brownies blend the rich goodness of traditional brownies with mochi's bouncy feel. The sweet rice flour gives them an amazing texture—crispy on top, super chewy inside—making them totally different from your everyday brownies.
I stumbled on this while trying out different Asian-inspired sweets, and now it's what everyone asks me to bring to parties. My friends always beg for "those stretchy chocolate squares" with that fun pull-apart feeling.
What You'll Need
- Sweet rice flour: Creates that signature stretchy texture grab Mochiko or glutinous rice flour from the international food aisle
- Dark chocolate: Brings deep flavor go for something 60% or darker for best taste
- Cocoa powder: Amps up the chocolate taste Dutch processed works best for smoothness
- Unsalted butter: Adds richness and helps with texture make sure it's soft
- Eggs: Hold everything together for the right structure
- Milk: Brings needed moisture for perfect texture
- Sugar: Cuts through the chocolate's bitter edge
- Vanilla extract: Makes chocolate taste even better stick with real stuff not artificial
- Baking powder: Adds just a bit of rise while keeping them dense
- Salt: Boosts chocolate flavor a tiny pinch makes all the difference
- Chocolate chunks: Create melty spots on top chop up good chocolate bars instead of using chips
Easy Making Steps
- Warm Up Your Oven:
- Turn oven to 320°F (160-170°C). This cooler temp than normal brownies lets the mochi texture form properly while cooking everything evenly. Put parchment in your 8×8 inch pan with extra hanging out for easy lifting later.
- Melt Your Chocolate Mix:
- In a double boiler, slowly melt chocolate and butter together. Keep stirring and use low heat to avoid burning. It should look smooth and shiny. Let it cool a bit so it won't scramble your eggs later.
- Mix The Liquid Stuff:
- In a big bowl, beat eggs until they're a little foamy, then mix in vanilla. The vanilla really brings out the chocolate taste when baked. Slowly pour in milk while still mixing. Make sure everything blends smoothly with no egg streaks.
- Add Your Chocolate:
- Pour your slightly cooled chocolate-butter mix into the egg mixture slowly while stirring all the time. This way the warm chocolate won't cook the eggs. You want it smooth and all one color.
- Blend Dry Ingredients:
- In another bowl, mix the sweet rice flour, cocoa, baking powder, salt, and sugar together. Make sure to break up any cocoa lumps for smoothness. Don't skip the salt—it really makes the chocolate pop.
- Make Your Brownie Mix:
- Pour the chocolate liquid into the dry mix. Fold it all together gently with a spatula. Don't overmix or they'll get tough—stop when you don't see any dry spots. This batter will be thinner than regular brownie mix.
- Bake Them Right:
- Pour the mix through a strainer into your pan to catch any lumps. This extra step makes them super smooth. Sprinkle chocolate chunks all over the top. They'll sink a bit while baking, making pockets of melty goodness throughout. Bake for 55-60 minutes until the top feels set but still wobbles slightly in the middle.
My favorite thing about these brownies is seeing someone take their first bite. There's always that moment when they're surprised then super happy when they feel that stretchy pull that only comes from sweet rice flour. My niece calls them "rubber brownies" and wants them every time her birthday comes around.
The Magic Behind The Chew
What makes these brownies so special is a process called gelatinization, the same thing that makes traditional mochi so bouncy. When sweet rice flour gets wet and hot, its starch soaks up water and swells, creating that chewy texture we love. Unlike regular brownies that need gluten for structure, these get their special feel from the amylopectin in rice flour. That's why they stay chewy for days after baking, while normal brownies often dry out.
Great Flavor Matches
These mochi brownies taste amazing with other complementary flavors. Try them with a scoop of vanilla ice cream for a classic combo, or green tea ice cream for an Asian twist. A light sprinkle of matcha powder before serving looks pretty and adds a slight bitterness that works well with the sweet. For something really indulgent, pour some condensed milk over them or serve with fresh berries to balance the richness with some tartness.
Fixing Common Problems
Getting your mochi brownies just right might take a try or two. If they turn out dry, you probably baked them too long or used too much flour. Try spooning flour into your measuring cups instead of dipping the cup in. If they seem too soft after the full cooking time, remember they firm up while cooling. The middle should still jiggle a little when you take them out. For the best texture, make sure everything is room temperature before you start, especially eggs and milk.
These mochi brownies perfectly combine rich chocolate flavor with that fun stretchy mochi pull—they'll wow everyone who tries them!
Recipe Q&A
- → How are these different from regular brownies?
Instead of wheat flour, these use sweet rice flour, which makes them chewy like mochi but keeps the rich chocolate flavor you love in brownies.
- → Can I use regular flour instead of sweet rice flour?
No, regular flour won't give that trademark chewy texture. Stick to sweet rice flour or mochiko since it’s the key ingredient.
- → How do I store these chocolate squares?
Keep them in an airtight container at room temperature for 2-3 days, or refrigerate for a week. A quick microwave (10-15 seconds) helps revive their softness after cooling.
- → Why should I sift the batter before baking?
Sifting ensures the sweet rice flour mixes smoothly, preventing clumps. It’s essential for the brownies’ consistency since clumpy batter can affect texture.
- → Can I add more mix-ins?
Sure! Toss in nuts, white chocolate chips, or even peanut butter swirls. Avoid anything too wet though, as it could change the batter’s texture.
- → Why do these bake at a lower temperature?
Using 320°F (a bit cooler than usual) gives the sweet rice flour time to cook evenly. This keeps the chewy texture while avoiding an overbaked outside.