
 Pin
Pin
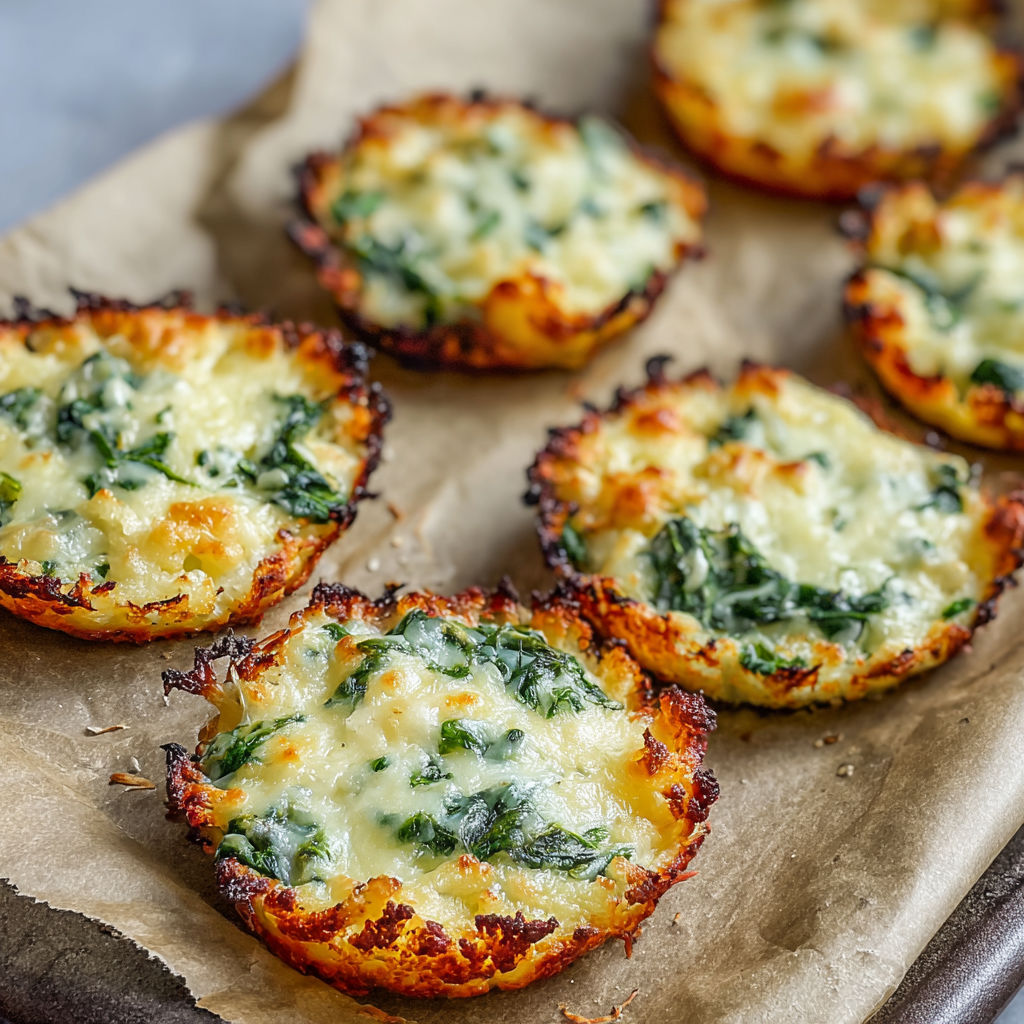
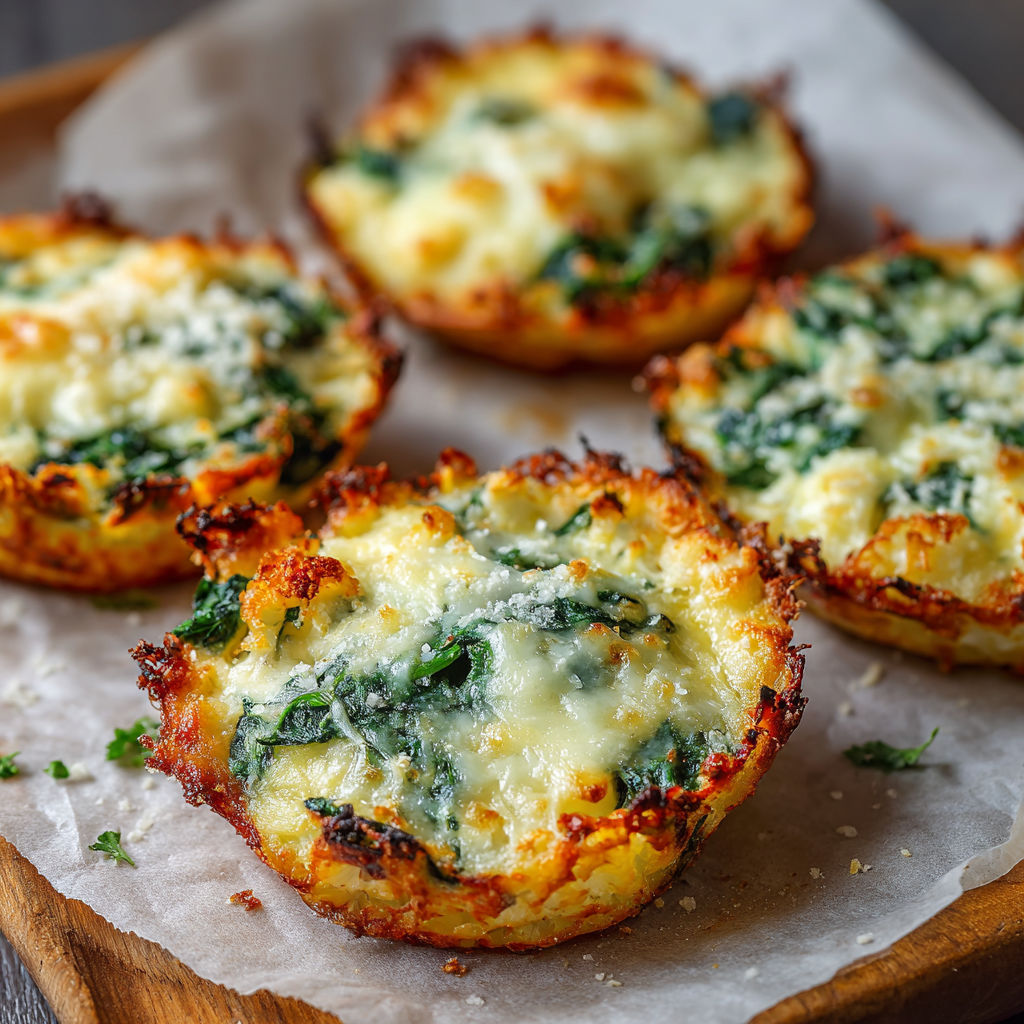
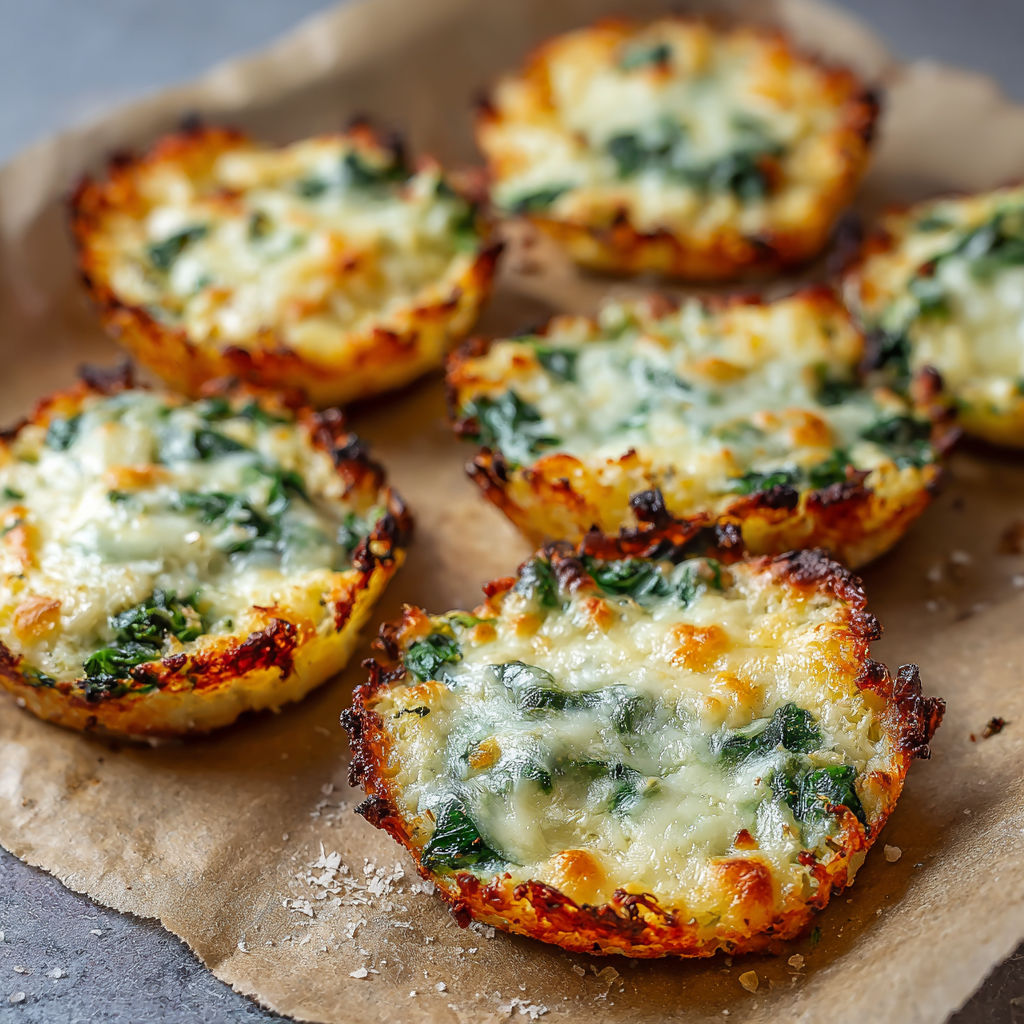
If you are searching for a naturally gluten free taco shell that packs in extra vegetables and flavor these cauliflower spinach taco shells are a total game changer. They get crisp around the edges with just enough tenderness in the center to fold and fill. I often make a double batch and use them all week with anything from breakfast eggs to a loaded veggie taco lunch.
I started making these when my niece refused to touch regular tortillas and now everyone in the family prefers these for taco night. They always disappear faster than I expect.
Ingredients
- Cauliflower riced: creates the soft flexible structure for the shells Aim for the freshest head with tight white florets
- Fresh spinach finely chopped: boosts color and sneaks in nutrients Choose dark green crisp leaves for the best flavor
- Shredded mozzarella cheese: binds everything together with a little gooeyness I use whole milk mozzarella for a creamier texture
- Eggs: provide the structure and hold the shells together Large eggs work best for consistency
- Salt: brings all the flavors together Avoid iodized salt which can be too harsh
- Black pepper: adds a mild heat and earthiness Freshly cracked is best
- Garlic powder: for a savory boost and gentle flavor Look for fine or granulated for best distribution
Instructions
- Preheat and Prepare Pan:
- Preheat your oven to 375 degrees Fahrenheit and line a baking sheet with parchment paper This step ensures nothing will stick when you are ready to peel the shells off later
- Rice the Cauliflower:
- Break the cauliflower into medium sized florets and place them in your food processor Pulse until it looks fine and crumbly like rice Be careful not to over process you want little crumbs not mush
- Cook the Cauliflower:
- Scoop the riced cauliflower into a microwave safe bowl Microwave it for five minutes to steam the veggie and soften the texture This step is essential for holding everything together
- Remove Moisture:
- Once cooked let the riced cauliflower cool slightly Place it in a clean kitchen towel and squeeze out as much moisture as you can This is the most important step for firm shells Remove more water than you think is necessary
- Mix the Batter:
- Move the drained cauliflower to a large mixing bowl Add chopped spinach shredded mozzarella eggs salt black pepper and garlic powder Stir thoroughly to make sure everything is well incorporated You want it to look like a thick sticky batter
- Shape the Shells:
- Scoop about a quarter cup of the mixture for each shell onto the prepared baking sheet Shape into thin even circles about a quarter inch thick Do not crowd the pan so the shells crisp up nicely
- Bake the Shells:
- Place the baking pan in the oven and bake for fifteen to twenty minutes Watch for the edges to turn golden brown and the centers to feel set to the touch
- Cool and Release:
- Let your shells cool down for a few minutes before releasing them gently from the parchment paper This prevents breakage and lets them firm up Serve warm filled with your favorite toppings
I love how the mozzarella melts into everything making these shells flexible and golden I will never forget making these for a friend with a gluten allergy and she declared them the best taco vessels she had ever tasted
Storage tips
Store leftover shells in an airtight container in the fridge for up to four days Reheat in a dry skillet or toaster oven to refresh their texture I have even stacked them between paper towels so they stay dry and a little crisp
Ingredient substitutions
Swiss or provolone cheese can stand in for mozzarella for a nuttier flavor If you want to go dairy free try vegan shredded cheese with an extra pinch of salt Kale or baby chard can swap in for spinach
Serving suggestions
Fill your shells with roasted sweet potatoes black beans and avocado or go classic with spiced ground chicken and crisp lettuce Use them for breakfast with scrambled eggs and salsa or just pair with a creamy hummus for snacking on the go
Cultural twist
Veggie based tortillas like these are popular in many modern health food circles Inspired by traditional Mexican ingenuity they put a fresh plant packed spin on classic taco night While not authentic they fit beautifully into weeknight family routines
Seasonal Adaptations
Try adding a handful of chopped fresh herbs in spring like cilantro or parsley Substitute steamed kale for spinach in fall or winter Use purple cauliflower for a fun colorful variation in summer
Three notes to ensure success
Be patient squeezing extra water from the cauliflower for shells that hold together Shape the circles evenly so they bake at the same rate Let them rest a minute before peeling them off the parchment for easy release
Success Stories
A few friends have doubled the recipe and frozen the cooled shells layered with parchment for future taco emergencies I have seen these shells win over even devout flour tortilla fans at a taco party
Freezer Meal Conversion
Let the baked shells cool completely before layering them with parchment paper Store in a freezer bag up to two months To reheat bake directly from frozen at 375 degrees for about eight minutes They are perfect for last minute taco cravings
These shells are healthy and versatile enough for any meal of the day Enjoy the fresh flavors and the satisfaction of sneaking more vegetables into your routine.
Recipe Q&A
- → How do I keep the shells from falling apart?
Be sure to squeeze out as much moisture as possible from the cooked cauliflower before mixing, as excess liquid can cause shells to be too soft.
- → Can I substitute spinach with other greens?
Yes, baby kale or chopped parsley are good substitutes, but adjust quantities for moisture content and flavor.
- → Are these shells suitable for freezing?
These shells freeze well; cool completely then separate with parchment before storing in a freezer bag. Reheat in the oven for best results.
- → What fillings work best with these shells?
Try grilled vegetables, seasoned beans, shredded chicken, or classic taco toppings for delicious combinations.
- → How do I make the shells crispier?
Bake a few extra minutes, monitoring closely to avoid burning, or finish under a broiler for added crunch.