
 Pin
Pin
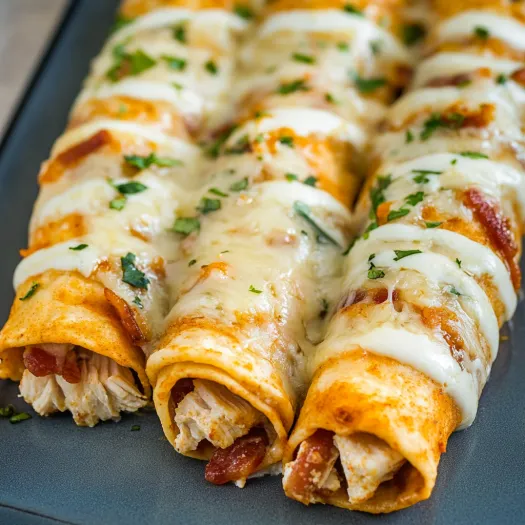
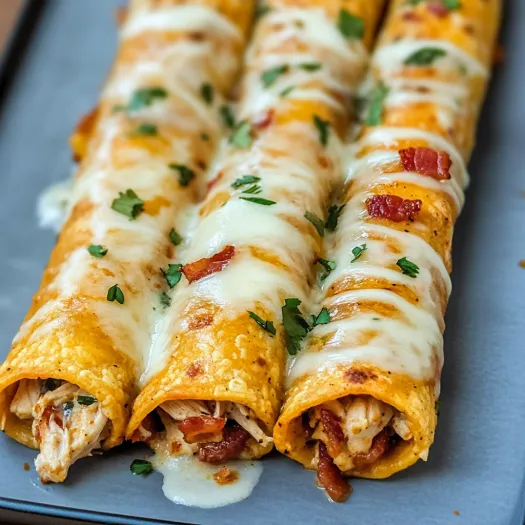
These keto chicken bacon ranch taquitos have become my favorite way to fix my Mexican food cravings without going over my carb count. Using cheese for the shell is so smart - it gets super crispy on the outside while keeping everything low carb and tasty inside.
I whipped these up during a movie night when I was really missing regular Mexican food while doing keto. Now they're a weekly request from my whole family, even the ones who don't do keto and could easily have regular taquitos instead.
Ingredients
- Mozzarella cheese slices: Make a flexible shell that gets nice and crispy but still bends for rolling
- Cooked shredded chicken: Gives you good protein and works with all the other flavors
- Cooked bacon: Adds that amazing smoky crunch and rich taste
- Low carb ranch dressing: Brings creaminess and tang without loading up on carbs
- Green onions: Add a nice bit of color and mild onion flavor
Step-by-Step Instructions
- Prepare the Filling:
- Mix your shredded chicken, bacon bits, ranch dressing, and chopped green onions in a bowl. Stir everything well so the flavors mix evenly. The ranch should just lightly coat everything without making it too wet.
- Set Up Your Baking Sheet:
- Heat your oven to 350°F. Put a silicone baking mat on a big baking sheet - you can't skip this part as it stops the cheese from sticking and lets you remove it easily after melting.
- Melt the Cheese:
- Put six mozzarella slices on the silicone mat with about an inch between each slice so they don't melt together. Bake for 5-7 minutes and keep an eye on them. The cheese should bubble up and get slightly brown at the edges - that's when you know they're ready to shape.
- Cooling Period:
- Take the baking sheet out and let the cheese cool for about a minute. This quick cool-down is key - it makes the cheese cool enough to touch without burning yourself, but still bendy enough to roll without breaking.
- Rolling Technique:
- Working fast while the cheese is still warm, put about 2 tablespoons of chicken mix along one side of each cheese slice. Starting from that filled edge, roll each slice tightly into a tube and put it seam-side down so it doesn't unwrap.
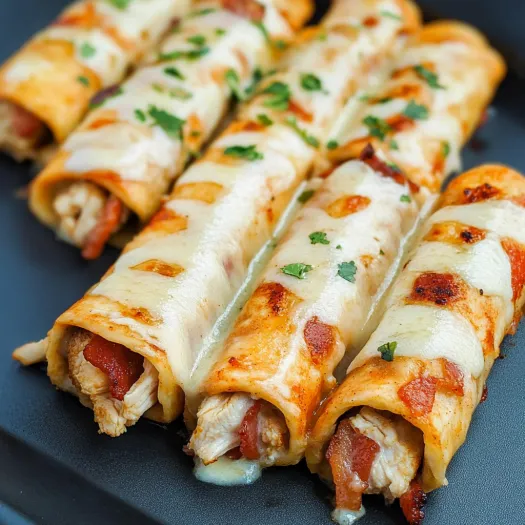
The mozzarella cheese really makes this dish special. I found out through lots of testing that pre-sliced works way better than shredded because it creates the perfect shell texture. The first time I made these for my doubtful husband, he couldn't believe the shells were just cheese.
Make-Ahead Options
You can make these taquitos up to three days before you need them and keep them in an airtight container in the fridge. This makes them great for meal prep or getting ready for parties ahead of time. To warm them up, just put them in a 350°F oven for about 5 minutes until they're hot and crispy again. Don't use the microwave though - it'll make them soggy instead of crunchy.
Flavor Variations
While chicken bacon ranch is always a hit, you can switch things up to match different tastes. Try buffalo chicken with blue cheese, beef with taco seasoning and cheddar, or even a breakfast version using scrambled eggs and sausage. The cheese shell trick works the same way no matter what filling you pick. Just make sure any ingredients are already cooked and not too wet, or your taquitos might get soggy.
Serving Suggestions
These taquitos taste amazing with keto-friendly dips. Try serving them with guacamole, spicy chipotle mayo, or more ranch dressing. For a full meal, add a simple side salad with olive oil and vinegar dressing. They're also great appetizers for watching sports or movie nights where everyone can enjoy them whether they're doing keto or not.
You'll want a silicone mat for sure. It's worth buying one if you plan to make these often!
Recipe Q&A
- → Can I make these rolls in advance?
They taste best when eaten right away, but you can mix up the chicken-bacon-ranch filling beforehand and keep it in the fridge. When you're hungry, just bake the cheese slices and wrap them around your filling.
- → What goes well with these rolls?
These rolls taste great with keto-friendly dips like guacamole, sour cream, homemade salsa, or a fresh green salad. For a fuller meal, add some oven-roasted veggies on the side.
- → Can I try different cheeses for the wraps?
Sure thing! Mozzarella makes the best flexible wrap, but you can try other melty cheeses such as cheddar, provolone, or pepper jack to create different flavor combos.
- → What's the best way to warm up leftovers?
To keep them crunchy, warm leftover rolls in your oven or toaster oven at 350°F for about 3-5 minutes until hot throughout. Don't use the microwave as it'll make the cheese wraps soggy.
- → Can I swap the chicken for something else?
For sure! Try using shredded pork, cooked ground beef, or even cooked shrimp instead. Just make sure whatever you use is fully cooked before mixing it into your filling.
- → Why do I need a silicone mat for this recipe?
A silicone mat keeps the cheese from sticking to your baking tray as it melts. If you don't have one, you can try parchment paper instead, though it might not work quite as well.