
 Pin
Pin
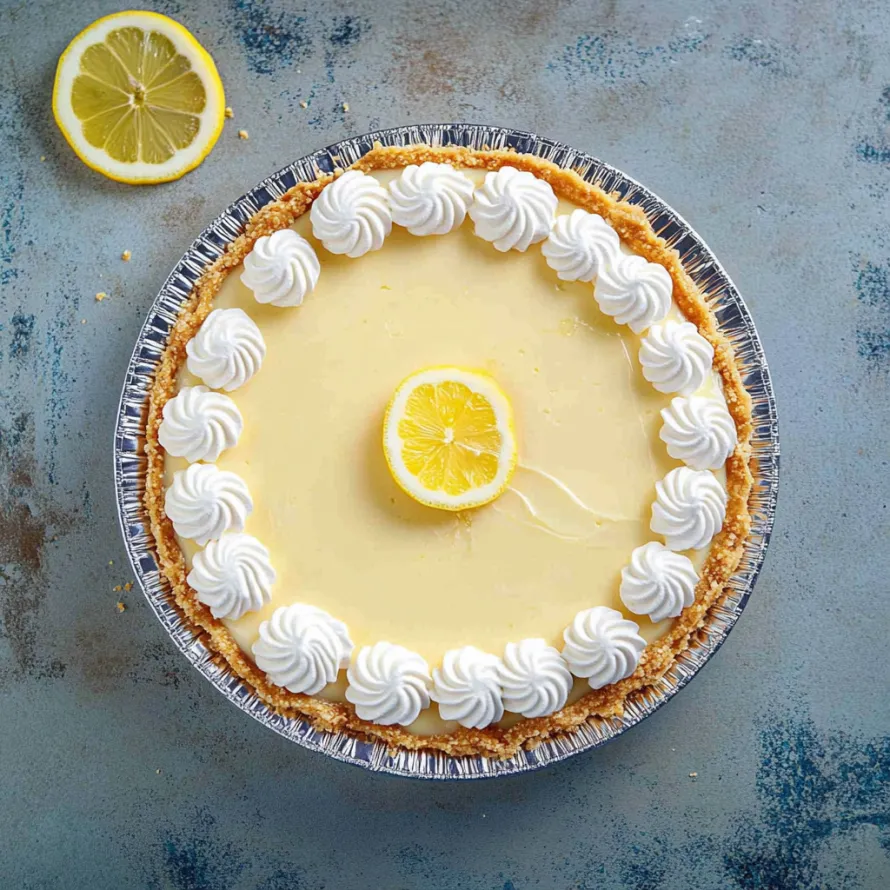
My summer savior is this no-bake lemon pie when it's so hot that cooking seems impossible. It needs just four basic ingredients yet manages to hit that sweet-tart balance perfectly, making everyone beg for my secret.
I whipped this up for a last-minute block party during a massive heatwave. Everyone went crazy for its cool, smooth texture and bright lemony kick. Now I can't show up to summer gatherings without bringing it along.
What You'll Need
- Sweetened condensed milk: gives that smooth sweetness that works against the sharp lemon. Try to grab brands without extra additives for best results.
- Lemon juice: squeeze your own if possible, though the bottled stuff works too. Its acid helps the filling set without heat.
- Cool Whip: adds airiness to the mixture. Make sure it's completely defrosted before you start.
- Graham cracker crust: delivers that essential crunch against the soft filling. Buying one saves time but making your own adds extra charm.
How To Make It
- Get Your Base Ready:
- Make sure your graham cracker crust is in its pan and ready to go. If you made one yourself, let it cool completely in the fridge. That contrast between crunchy bottom and silky filling is what makes everyone come back for seconds.
- Create Your Filling:
- Grab a big bowl and mix the sweetened condensed milk with lemon juice until they're fully blended. You'll see it start to get thicker as they mix together. That's the lemon acid working its magic on the milk proteins, helping everything set up without baking.
- Add The Cool Whip:
- Slowly fold your thawed Cool Whip into the lemon mixture with a rubber spatula. Don't rush this part - use gentle up and over motions instead of stirring hard. This keeps all the air bubbles intact for that cloud-like texture everyone loves.
- Pour And Cool:
- Spoon your mixture into the waiting crust and smooth the top flat for that picture-perfect look. Cover it with the plastic lid if your store-bought crust came with one, or loosely wrap with plastic (don't let it touch the filling). Stick it in the fridge for at least 4 hours, but leaving it overnight works even better.
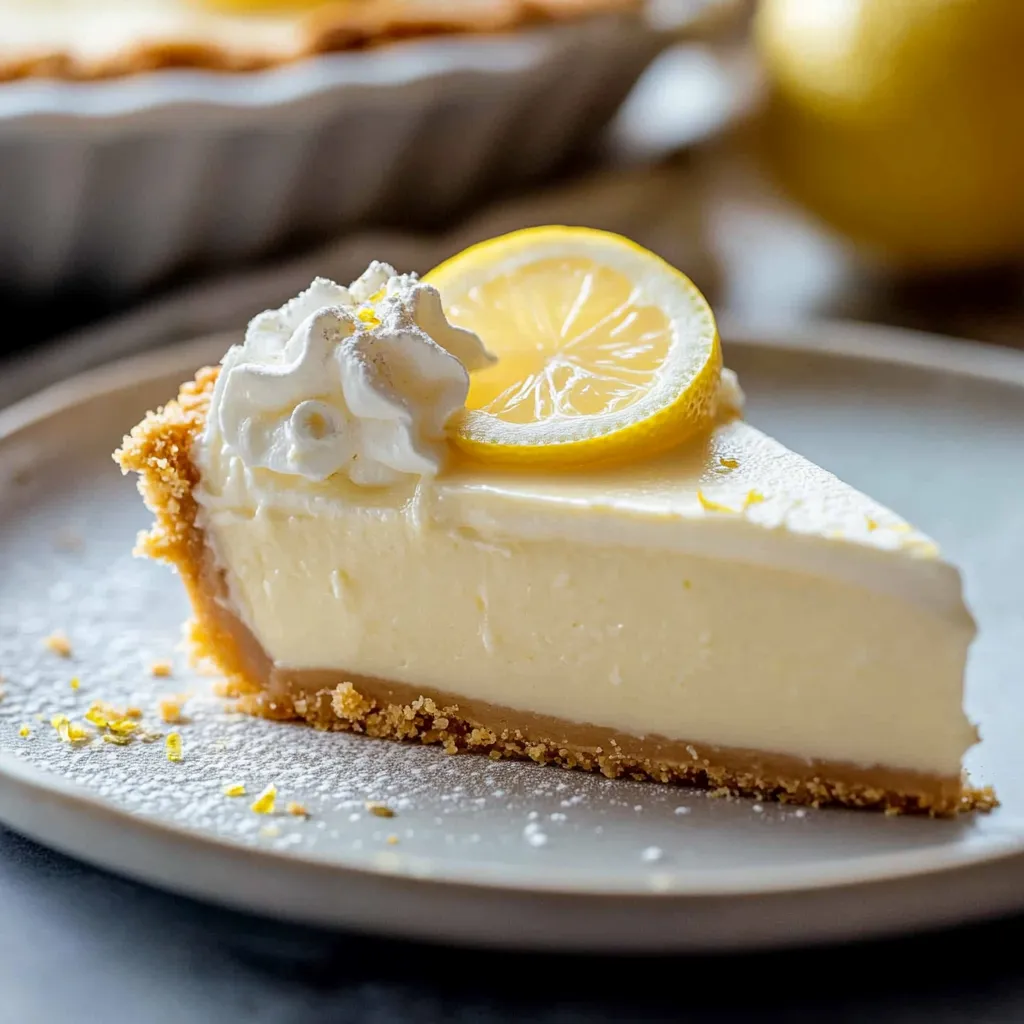
What makes this pie slice so perfectly is actually some cool kitchen chemistry. The acids in lemon juice interact with proteins in condensed milk to create that wonderful texture. I figured this out playing around with different amounts, and it's why each slice stands tall without being too firm or too soft.
Custom Touches
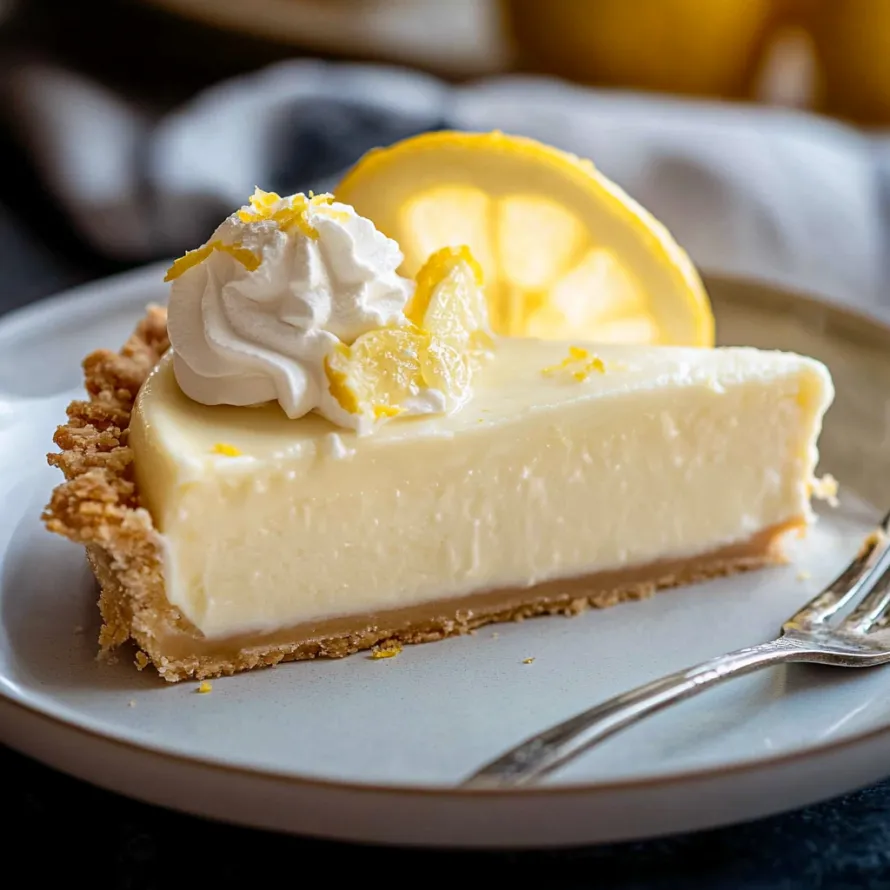
This basic lemon pie can be tweaked in so many ways. Try throwing in some lemon zest for extra zing, or mix in fresh blueberries for pretty color and flavor. For fancy dinners, I sometimes put a layer of thin strawberry slices on the bottom before adding the filling - it's such a nice surprise when you cut into it.
Keeping It Fresh
You can keep this pie in your fridge for about a week, though the crust gets a bit softer after three days. It freezes really well too. Just wrap it tightly once it's fully set and pop it in the freezer for up to three months. Let it thaw in the fridge overnight when you want to eat it. I usually make two at once - one to enjoy right away and another tucked away for surprise visitors.
How To Serve It
This pie tastes best with a big spoonful of freshly whipped cream and a tiny bit of lemon zest scattered on top. For fancy occasions, add thin lemon slices or candied lemon peel. I've learned it tastes amazing when it's really cold, straight from the fridge. Throw some fresh berries on the plate too for a summer treat that's both fancy and refreshing.
Recipe Q&A
- → Can I use fresh lemon juice instead of bottled?
Definitely! Fresh juice gives a stronger, more zesty taste that really improves the pie.
- → Can I make my own graham cracker crust?
Sure thing! Just smash some graham crackers, mix with melted butter, and push into your pie pan for a DIY crust.
- → How long does this dessert last in the refrigerator?
It stays good for about a week in the fridge. Just wrap it up well so it doesn't pick up other food smells.
- → Is it possible to freeze this pie?
You bet! Just let it thaw out before you serve it and maybe add fresh toppings after.
- → What toppings work best with this pie?
A swirl of whipped cream, cool whip, or some grated lemon peel on top really makes it look and taste amazing.
- → Can I make this pie ahead of time?
For sure! That's one of its best points. Make it a day early since it needs time to get firm in the fridge anyway.