
 Pin
Pin
Paneer bread rolls have become my go to snack for cozy afternoons and last minute company Because they bake up golden with a lightly crisp crust and a creamy spicy filling these rolls are always met with big smiles at home
The very first time I made these paneer bread rolls my husband could not believe they were baked instead of fried They instantly became a Sunday ritual for us
Ingredients
- White bread: Provides a tender structure for the rolls To ensure softness select a fresh loaf without seed crusts
- Paneer: Offers creamy texture and protein Homemade or store bought both work just be sure it is fresh
- Boiled potato: Helps bind the filling and gives the rolls a melt in the mouth quality Use starchy potatoes for best texture
- Fresh coriander: Adds a burst of herbal freshness Choose bright leafy bunches
- Green chili: Brings gentle heat Adjust the amount according to your preference and select firm slim chilies
- Fennel powder: Lends a sweet aromatic note Check that it smells strong and sweet
- Salt to taste: Enhances all the flavors Use fine salt so it blends evenly
- Garam masala powder: Delivers warmth Choose a blend with a fresh aroma for bold flavor
- All purpose flour: Helps seal the rolls and creates a crispy crust when baked Sift it before use
- Water: Blends with flour to make a tidy sealing slurry Use filtered water if available
- Olive oil: Brushed on top for golden color and to crisp the exterior Choose extra virgin for richer flavor
- Sesame seeds: Add crunch and visual appeal Opt for fresh seeds that snap when bitten
Step-by-Step Instructions
- Preheat the Oven:
- Set your oven to one hundred fifty degrees Celsius Let it heat for a full ten minutes to create an even baking environment
- Prepare the Slurry:
- In a small bowl blend the all purpose flour and water together Stir slowly until you have a thick paste with no lumps The paste should cling to a spoon and not drip off easily This will help seal your bread rolls tightly
- Trim and Flatten the Bread:
- Take each slice of white bread and trim away the edges Carefully use a rolling pin to flatten the bread slices to about half their original thickness Apply even pressure so the bread does not tear and roll all the way to the edges for easy sealing
- Make the Filling:
- In a large bowl mix the grated paneer and boiled potato together Add chopped coriander green chili fennel powder salt and garam masala Use a fork to incorporate everything so there are no lumps The filling should look speckled with herbs and spice and hold together when pressed
- Fill and Seal the Rolls:
- Spoon a small portion of the filling onto the center of each flattened bread slice Brush the edges of the bread with the flour slurry using your fingers or a small pastry brush Gently fold the bread over the filling and firmly pinch the edges together to seal Wrap each roll in a moist cloth to prevent drying as you finish the others
- Shape and Arrange the Rolls:
- After shaping all the rolls carefully place them seam side down on a baking tray lined with parchment paper Space each roll out slightly so they brown evenly
- Oil and Top:
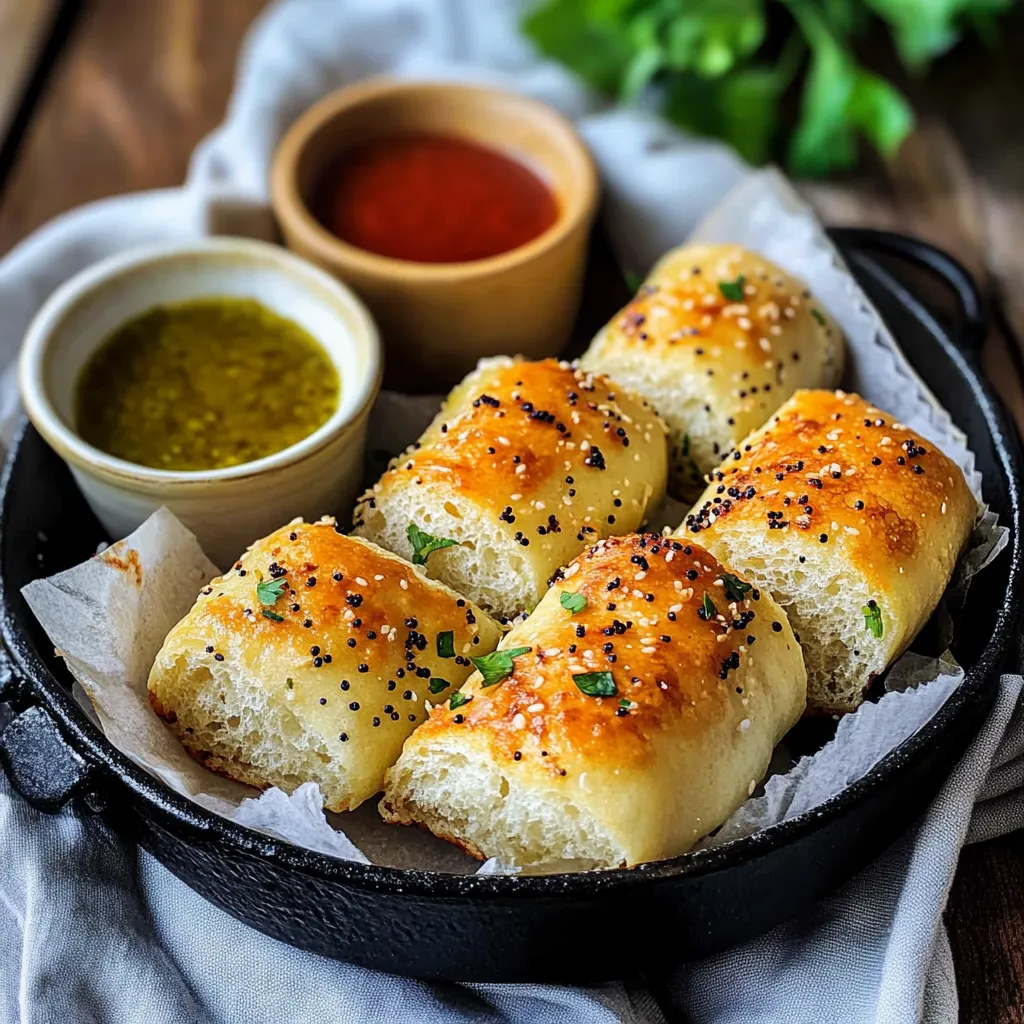
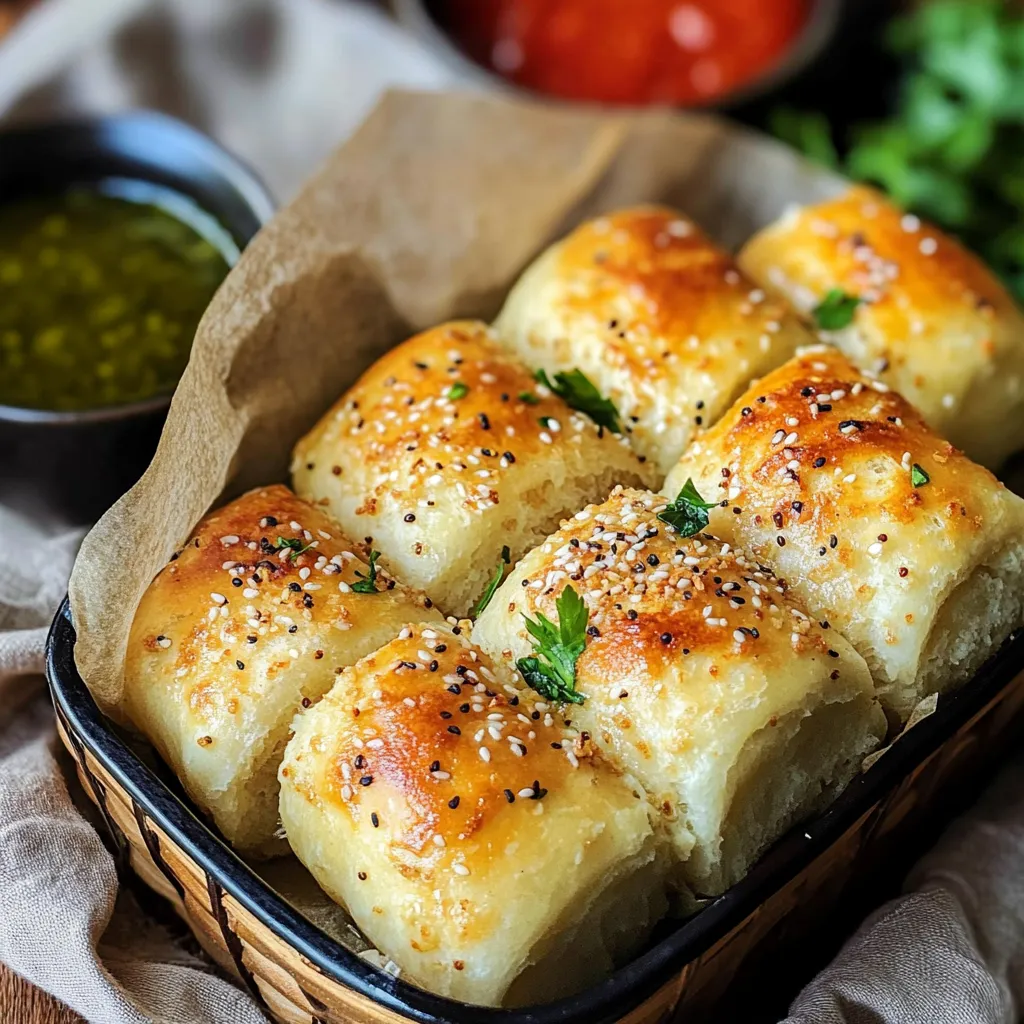
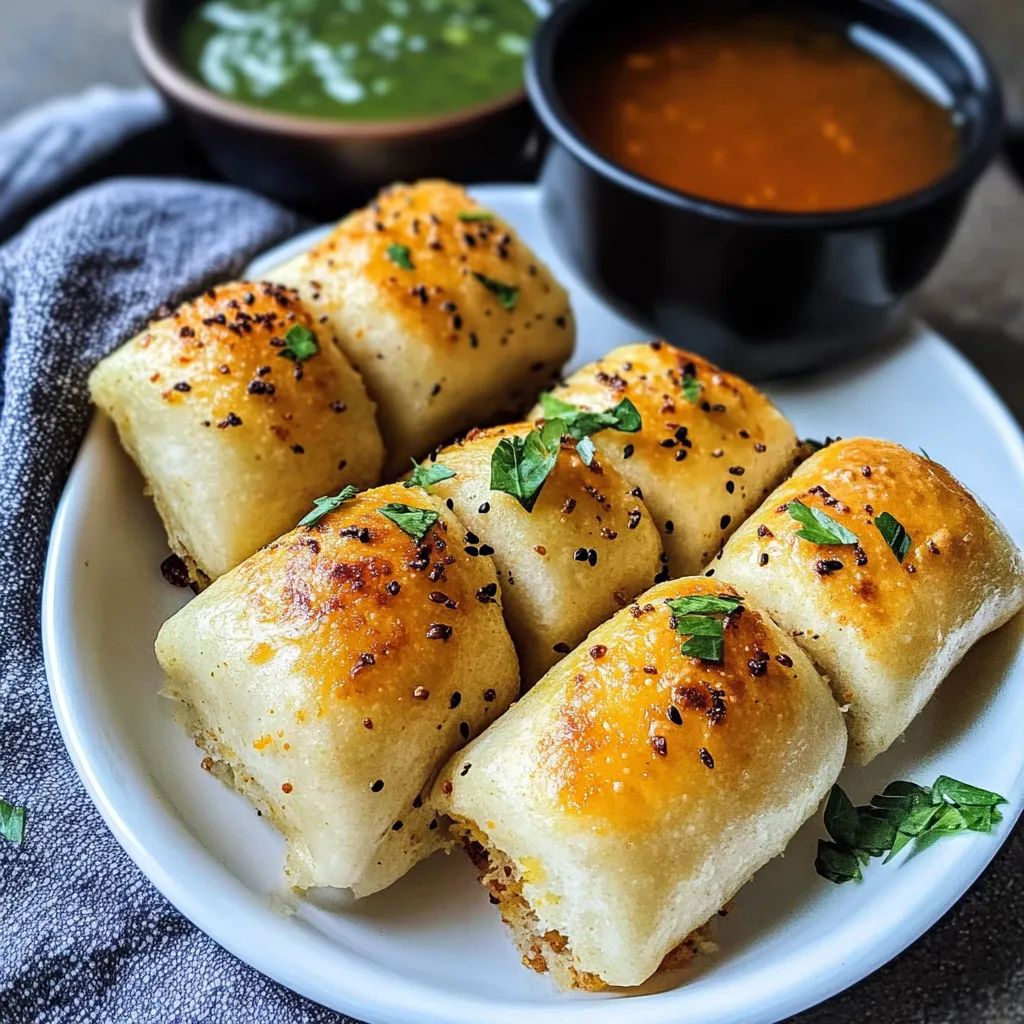
- Lightly brush each roll all over with olive oil so they bake to a golden shade Sprinkle a generous pinch of sesame seeds over the tops pressing gently so the seeds stick
- Bake:
- Transfer the tray to your preheated oven Bake for ten to fifteen minutes watching closely The bread should crisp at the edges and show pale golden spots Remove when you see the color deepen and the sesame seeds look toasted
- Serve:
- Transfer the hot rolls to a serving platter Serve with tangy ketchup and fresh coriander chutney for dipping The rolls are best enjoyed immediately for a warm crisp bite
For me the magical part is always the moment you press sesame seeds on top They toast up beautifully making the first bite extra special My kids love helping sprinkle them on and those little hands turn it into a real family moment
Storage Tips
Once cooled to room temperature you can store leftover rolls in an airtight container for up to two days If you wish to keep them longer freeze the shaped rolls on a tray then transfer to a freezer bag Bake directly from frozen adding three to five extra minutes to the baking time To reheat simply warm in the oven for five to seven minutes at one hundred fifty degrees Celsius This keeps them from getting soggy unlike microwaving
Ingredient Substitutions
No paneer on hand You can use firm tofu or ricotta cheese for a similar texture For a dairy free version try mashed chickpeas or grated firm tofu instead Potatoes can be subbed with cooked sweet potato for a touch of natural sweetness For the bread you can use whole wheat slices for more fiber Both white and brown bread work equally well so you can use your family’s favorite
Serving Suggestions
Paneer bread rolls are at their best paired with something tangy and fresh Homemade coriander mint chutney or even a spicy mango chutney is my top pick If serving at a party slice the rolls in half and arrange them upright on a platter to show off the pretty filling These also go well in lunch tiffins with a small salad and yogurt dip on the side
Cultural Context
Paneer bread rolls are popular at tea time gatherings across many parts of North India They grew in popularity as a creative way to use up leftover bread and leftover paneer filling every home puts its spin on the flavors Some families like a dusting of chaat masala for zing while others sneak in a little grated beetroot or carrot to make it more colorful
Try these rolls warm from the oven with your favorite chutney and savor their golden crispness Every bite is sure to be a comfort
Recipe Q&A
- → Can I fry these paneer bread rolls instead of baking them?
Yes, you can deep fry these rolls instead of baking. Heat oil in a pan and fry the prepared rolls until golden brown on all sides. This will give them a crispier texture, though baking is a healthier alternative.
- → How can I make these rolls ahead of time?
You can prepare the filling and assemble the rolls in advance, then keep them refrigerated (covered with a moist cloth to prevent drying) for up to 4 hours before baking. Alternatively, you can freeze the assembled unbaked rolls for up to a month and bake them directly from frozen, adding a few extra minutes to the baking time.
- → What can I substitute for paneer?
If paneer isn't available, you can use cottage cheese (drained and crumbled), tofu (firm and crumbled), or ricotta cheese as alternatives. Each will provide a slightly different flavor and texture, but will work well with the spices in the filling.
- → Can I make these rolls without potatoes?
Yes, you can omit the potatoes and increase the paneer quantity to 2 cups. You could also substitute with grated carrots, corn, or finely chopped bell peppers to maintain the texture and bulk of the filling.
- → What other dipping sauces pair well with these rolls?
Besides ketchup and coriander chutney, these paneer bread rolls pair excellently with mint yogurt sauce, tamarind chutney, sweet chili sauce, or even a spicy mayo dip made with mayonnaise and hot sauce.
- → How do I know when the rolls are properly baked?
The rolls are done when they turn golden brown on the outside and feel crisp to touch. This typically takes 10-15 minutes at 150°C, but oven temperatures may vary, so keep an eye on them after the 10-minute mark.