
 Pin
Pin
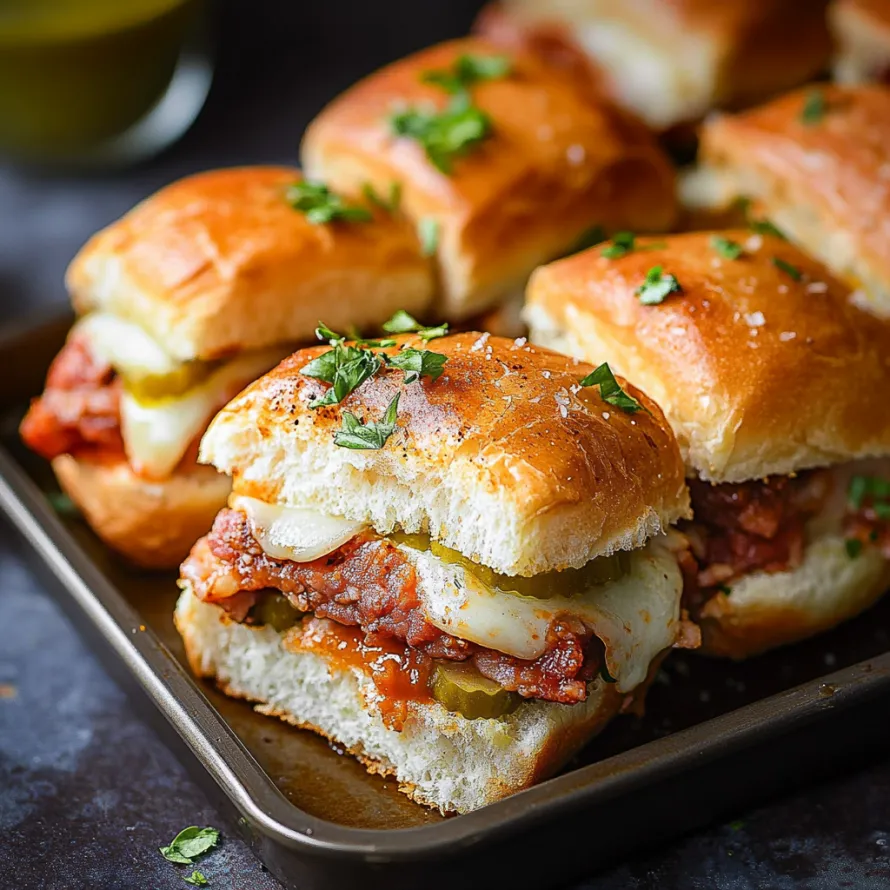
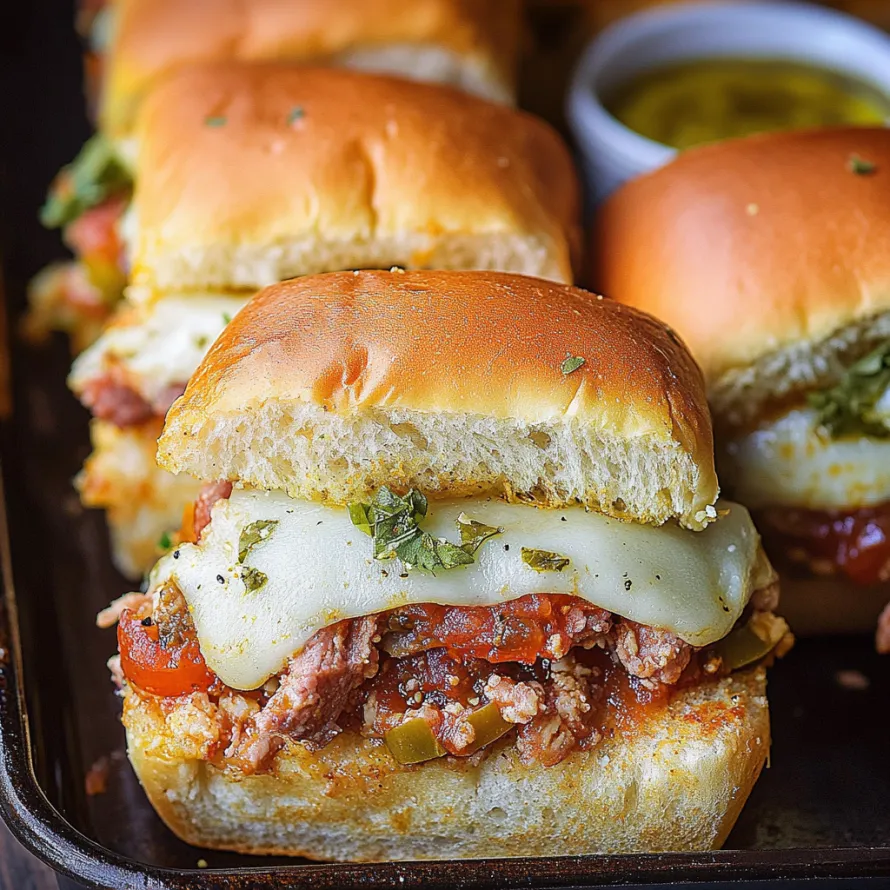
These Italian sub sliders turn regular deli sandwiches into crowd-pleasing bites that never last long at parties. With three types of meat and tasty provolone plus zesty peppers, you'll get that real Italian sub taste in a fun, easy-to-share format.
I whipped these up for a block party when I was rushed, and now they've become what I'm known for – friends actually text me to bring them whenever we hang out.
Ingredients
- Kings Hawaiian rolls: They're a bit sweet which works great with all the savory stuff inside
- Thinly sliced ham: Gives a soft flavor base that helps the other ingredients pop
- Salami: Brings that genuine Italian deli taste with just the right mix of salty and spicy
- Pepperoni: Adds the zippy kick that makes folks remember these sliders
- Provolone cheese: Gets all gooey when heated and tastes like what you'd get at a real sub shop
- Pepperoncini: Gives that tangy zing that cuts through the heavy parts
- Hot cherry peppers: They look pretty and pack a punch that wakes up your mouth
- Butter, garlic, and Italian seasoning: Mix up to make an amazing topping you can't resist
- Fresh garlic: Way better than the jarred stuff for really good flavor
Step-by-Step Instructions
- Warm Up Your Oven:
- Turn it on to 350 degrees Fahrenheit. This temp will get everything warm inside while the cheese melts and the tops get crispy without burning.
- Get Your Rolls Ready:
- Cut your Hawaiian rolls across the middle but keep them all connected. Put the bottom part on a baking sheet. Keeping them together saves tons of time compared to making separate sandwiches.
- Stack Up Your Fillings:
- First lay down ham all over the bread. Then add a layer of salami followed by pepperoni to build up different tastes. Top it all with provolone making sure it covers everything so it'll hold it all together once melted.
- Sprinkle On The Peppers:
- Scatter cherry peppers and pepperoncini all over the cheese. These give that sharp tangy taste that balances out the fatty meats and cheese.
- Mix Up The Butter Stuff:
- Stir melted butter with Italian spices and smashed fresh garlic until it's all combined. This tasty mix will soak into the bread and flavor every bite.
- Brush And Cover Everything:
- Slather that butter mix all over your assembled sliders getting it into all the cracks. Then cover the whole thing with foil to trap in steam and help melt that cheese right.
- Cook Them Just Right:
- Let them bake about 30 minutes until they're golden on top and all that cheese has gone gooey. The foil helps keep the tops from getting too brown too fast.
- Cut And Dig In:
- Let them cool just a minute then cut along where the rolls naturally separate. Serve them right away while they're still warm maybe with some marinara sauce for dipping.
Those pepperoncini might not seem like much but they bring that real Italian sandwich shop flavor that takes these sliders from just okay to amazing. At my house everyone fights over the pieces with extra peppers so I always throw in more than called for.
Make Ahead Options
You can totally make these ahead of time. Stack up all the ingredients except the butter topping the day before then wrap and stick in the fridge. About half an hour before you want to eat let them warm up a bit add the butter mix and bake as normal. They actually taste better when the flavors have some time to mix together.
Perfect Pairings
These Italian sub sliders go great with a basic green salad drizzled with Italian dressing to cut through the richness. If you're feeding a big group they work well next to pasta salad baked beans or some roasted veggies. Don't skip the marinara dipping sauce if you can help it – it adds that bright tomato flavor that really completes the whole Italian experience.
Customization Ideas
You can switch these sliders up in lots of ways. Want them milder? Skip the hot cherry peppers and go with banana peppers instead. Got vegetarian friends? Try layers of cooked veggies roasted red peppers and a few different cheeses. You can also add thin-sliced red onion fresh basil or a splash of Italian dressing to change things up.
These Italian sub sliders are always a winner. I've never seen leftovers!
Recipe Q&A
- → Can I make these Italian Mini Sandwiches ahead of time?
Definitely! You can put these together up to a day before serving. Just follow all the steps but wait to add the butter mixture until right before you bake them. Store them covered in your fridge, then add the garlic butter and pop them in the oven when you're ready to eat.
- → What can I substitute for Kings Hawaiian rolls?
Any soft dinner rolls will do the trick. Try using brioche buns, potato rolls, or regular slider buns. What matters most is finding rolls that come connected in one piece so you can cut through them all at once horizontally.
- → Are there vegetarian alternatives for these sliders?
For sure! Switch out the meats for some nice grilled veggies like zucchini, eggplant, and sweet roasted peppers. You can also try meat substitutes and keep the provolone or swap it for dairy-free cheese to make them vegan. The tasty garlic-herb butter works great with any fillings you choose.
- → How spicy are these sliders?
They've got a medium kick from the pepperoncini and hot cherry peppers. Want them milder? Just cut back on the hot cherry peppers or leave them out and go with mild pepperoncini. Need more heat? Toss some red pepper flakes into your butter mix or pick spicier types of salami.
- → What sides pair well with these sliders?
They're great with marinara sauce for dipping as the recipe mentions. Other good matches include Italian pasta salad, chips, pickle spears, or a fresh green salad with Italian dressing. If you want something heartier, serve them with a bowl of tomato soup or minestrone.
- → Can I freeze these sliders?
They freeze really well both before and after cooking. To freeze them uncooked, put everything together except the butter topping, wrap them tight in foil and freeze for up to a month. Let them thaw in your fridge overnight, then add the butter and bake. If they're already cooked, you can store them in an airtight container for up to 2 months and warm them up in a 325°F oven when you're ready to eat.