
 Pin
Pin
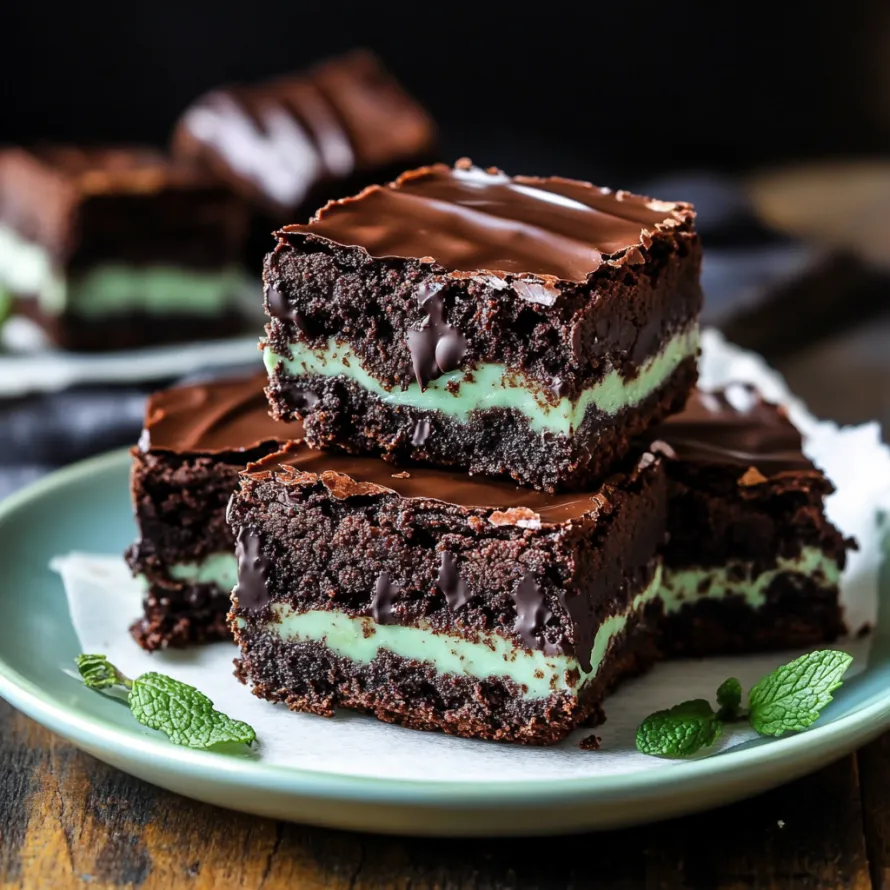
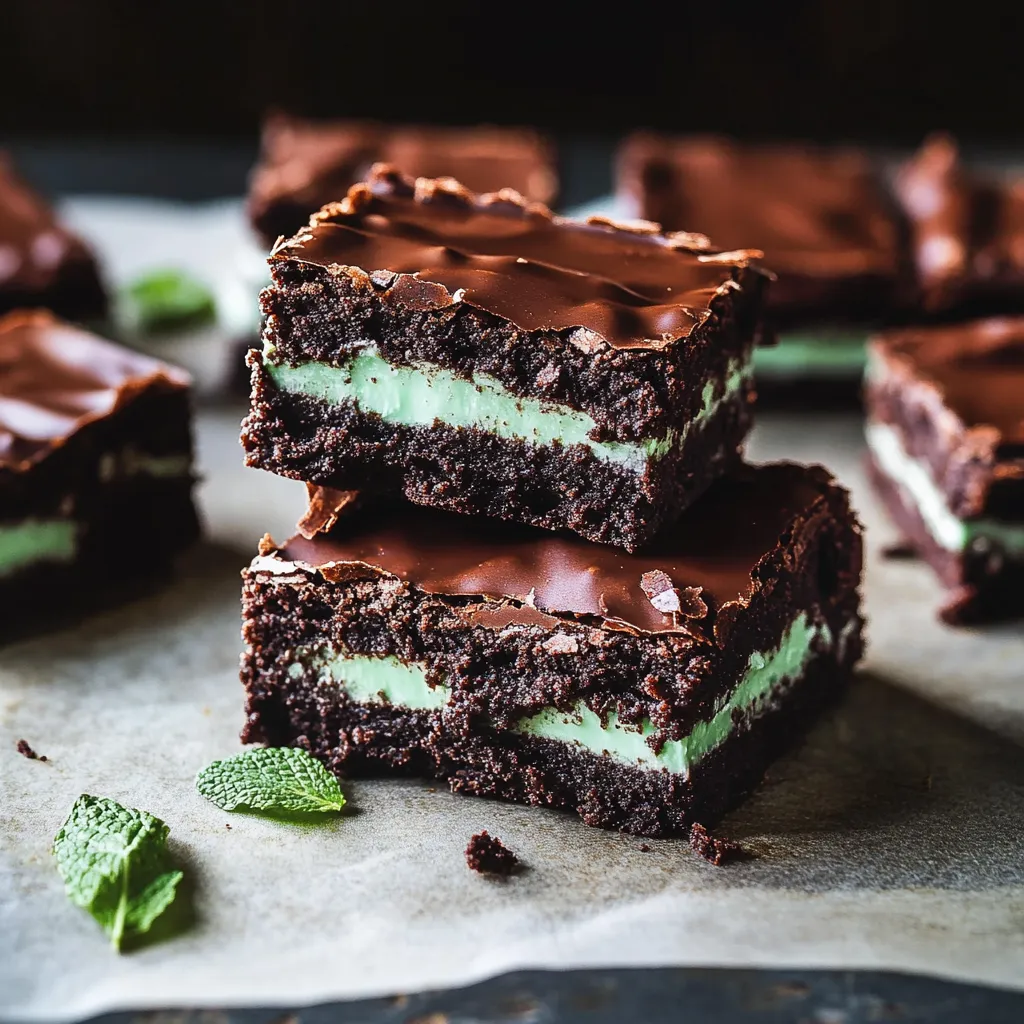
Transform ordinary brownies into something special with this three-layer treat featuring rich chocolate, cool mint, and smooth ganache on top. It's the perfect mix of fudgy goodness and refreshing flavor that'll make any mint chocolate fan happy.
I whipped these up for a party several years back, and they vanished quicker than anything else on the sweets table. These days my family asks for them at every get-together, particularly in winter when that cool mint feels so nice after heavy holiday meals.
What You'll Need
- Unsalted butter: Gives these brownies their richness and helps make them fudgy. Stick with unsalted so you can control exactly how much salt goes in
- Semisweet chocolate: Brings deep flavor without too much sweetness. Try to find bars with about 60% cocoa for the best outcome
- Granulated sugar: This helps create that crackly top brownies are famous for
- Light brown sugar: Keeps everything moist and adds slight caramel hints that work well with chocolate
- Eggs at room temperature: Mix in much better when they're not cold. Chilly eggs might make your melted chocolate harden up
- Real vanilla extract: Makes the chocolate taste even better. Skip the fake stuff
- All purpose flour: We don't use much because we want dense, fudgy brownies instead of cakey ones
- Natural cocoa powder: Kicks up the chocolate flavor. Don't swap for Dutch process as it'll change how they turn out
- Peppermint extract: Gives that true mint kick. Make sure it's peppermint specifically—regular mint extract often tastes fake
- Powdered sugar: Makes the mint layer smooth and creamy
- Green food coloring: You can skip it, but it helps show off the mint layer
Making Your Brownies
- Get Your Chocolate Mix Ready:
- Slowly melt the butter and chocolate until it's completely smooth. You can use your microwave or stovetop, but watch it closely so it doesn't burn. Let it cool a bit before you add eggs or you'll end up with scrambled eggs in chocolate.
- Mix Your Brownie Batter:
- Stir both sugars into your cooled chocolate mix first so they start to dissolve. Add eggs one by one, mixing each one in fully before adding another. This builds the texture that makes brownies special. Gently fold in your dry stuff just until mixed—don't overdo it or you'll get tough brownies.
- Bake Them Just Right:
- Spread your batter into a paper-lined pan, making sure it reaches all corners. Bake until the edges start to pull away but the middle seems slightly undercooked. When you stick a toothpick in, you want moist crumbs, not wet batter. Slightly underbaking gives you fudgy brownies. Let them cool completely before the next step.
- Make The Mint Frosting:
- Beat softened butter until it's light and fluffy, then mix in sugar and milk. Add peppermint extract last so you can adjust the taste. Start with less than you think and add more if needed. Spread evenly over your cooled brownies and chill until firm before the final layer.
- Finish With Chocolate On Top:
- Melt butter and chocolate chips together until totally smooth. Pour over your chilled mint layer while still warm but not hot. Spread quickly because it'll start setting as soon as it hits the cold mint layer. Chill until completely set for clean-cut slices.

Peppermint extract is what makes these brownies stand out. I found through lots of testing that real peppermint extract gives you that crisp, fresh mint taste, while regular mint extract often comes across fake and reminds people of toothpaste. That one small detail completely changes how they taste.
Getting Perfect Layers
The key to beautiful layers in these brownies is taking your time and watching temperatures. Each layer needs to set before you add the next one. When you're putting the chocolate topping over the cold mint frosting, work fast but gentle. The chilled mint makes the warm chocolate start to set right away, which might create swirls if you mess with it too much. I find using an offset spatula in one smooth move works best.
Keeping And Eating
These brownies actually taste better after they sit awhile as the flavors mix together. Keep them covered in your fridge where they'll stay good for up to 5 days. For the best experience, take them out about 20 minutes before you want to eat them. The contrast between the fudgy brownie and cool mint becomes more noticeable when they're just slightly chilled, and the chocolate top stays perfectly set.
Try Different Flavors
The mint chocolate combo is a classic, but you can easily switch things up. Add a splash of orange extract to the brownie part for a holiday twist that gives you chocolate-orange-mint brownies. Coffee lovers might like adding a teaspoon of espresso powder to the brownie mix—it makes the chocolate taste stronger without tasting like coffee. For some crunch, throw in some mini chocolate chips to the brownie batter or sprinkle crushed peppermint candies on the chocolate topping before it hardens.
These rich, cool brownies will be a hit no matter when you serve them!
Recipe Q&A
- → How do I get clean cuts when slicing these brownies?
For tidy slices, grab a super sharp big knife and cut quickly. Wipe your knife clean after each cut with a paper towel. Making sure the brownies are really cold before you start cutting also helps you get nice, clean edges.
- → Can I make these brownies ahead of time?
Absolutely! You can bake the brownies without frosting and freeze them, then thaw in your fridge overnight before adding the mint and chocolate layers. Or you can finish the whole thing and freeze it completely, just let it thaw in your fridge the night before you want to eat them.
- → What's the difference between mint extract and peppermint extract?
Peppermint extract gives you that real mint taste everyone loves, but regular mint extract often tastes like you're eating toothpaste. For these brownies, we really suggest using peppermint extract to get the yummiest flavor.
- → Can I make these in a smaller pan?
Sure thing, you can use an 8-inch or 9-inch square pan if you cut the frosting and chocolate topping amounts in half. Just keep the brownie base recipe the same as your standard frosted brownie recipe.
- → How long do these brownies stay fresh?
You can leave these brownies out for a few hours, but if you want to keep them longer, wrap them up tight and store them in your fridge for up to 5 days.
- → Why do I need to chill the brownies between layers?
Chilling helps each layer get firm before you add the next one. This is super important for the mint frosting part, since it needs to harden before you pour on the warm chocolate or else your layers will mix together and look messy.